Project settings
From a chosen project's dashboard, the ![]() Settings button, located in the header, enables you to manage the configurations and settings for your Strapi Cloud project and its environments.
Settings button, located in the header, enables you to manage the configurations and settings for your Strapi Cloud project and its environments.
The settings' menu on the left side of the interface is separated into 2 categories: the settings for the entire project and the settings specific to any configured environment for the project.
Project-level settings
There are 5 tabs available for the project's settings:
General (project)
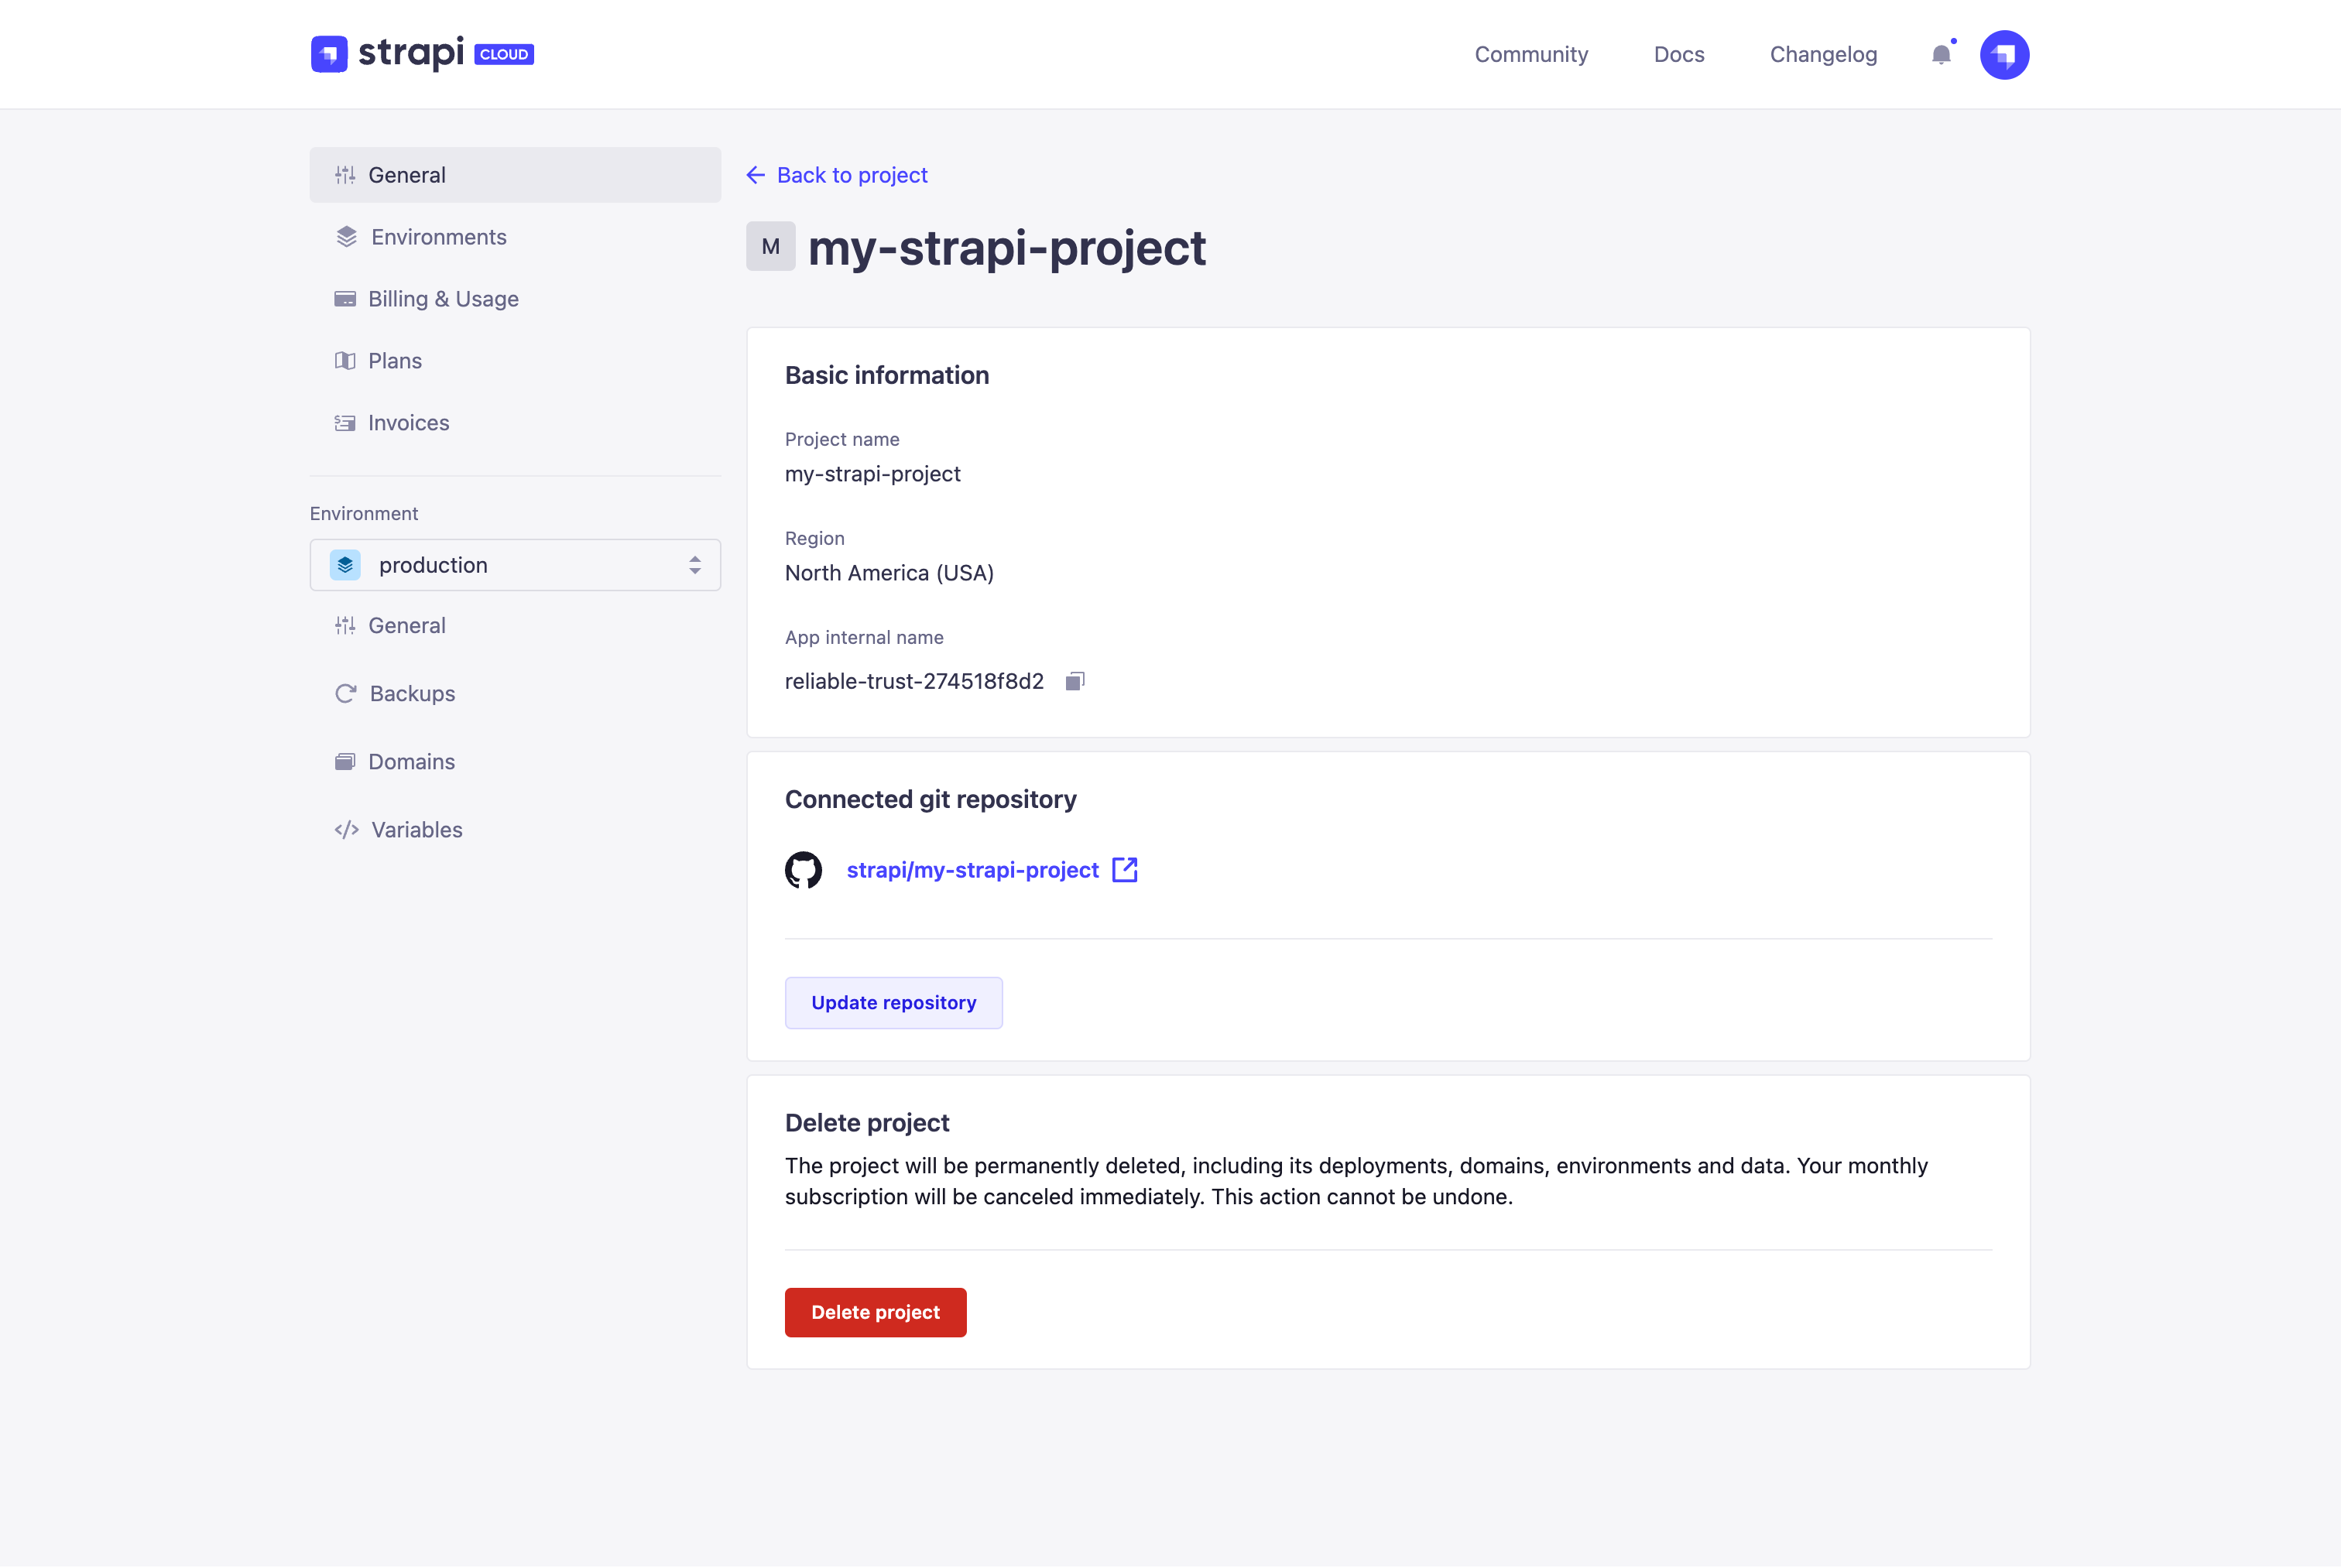
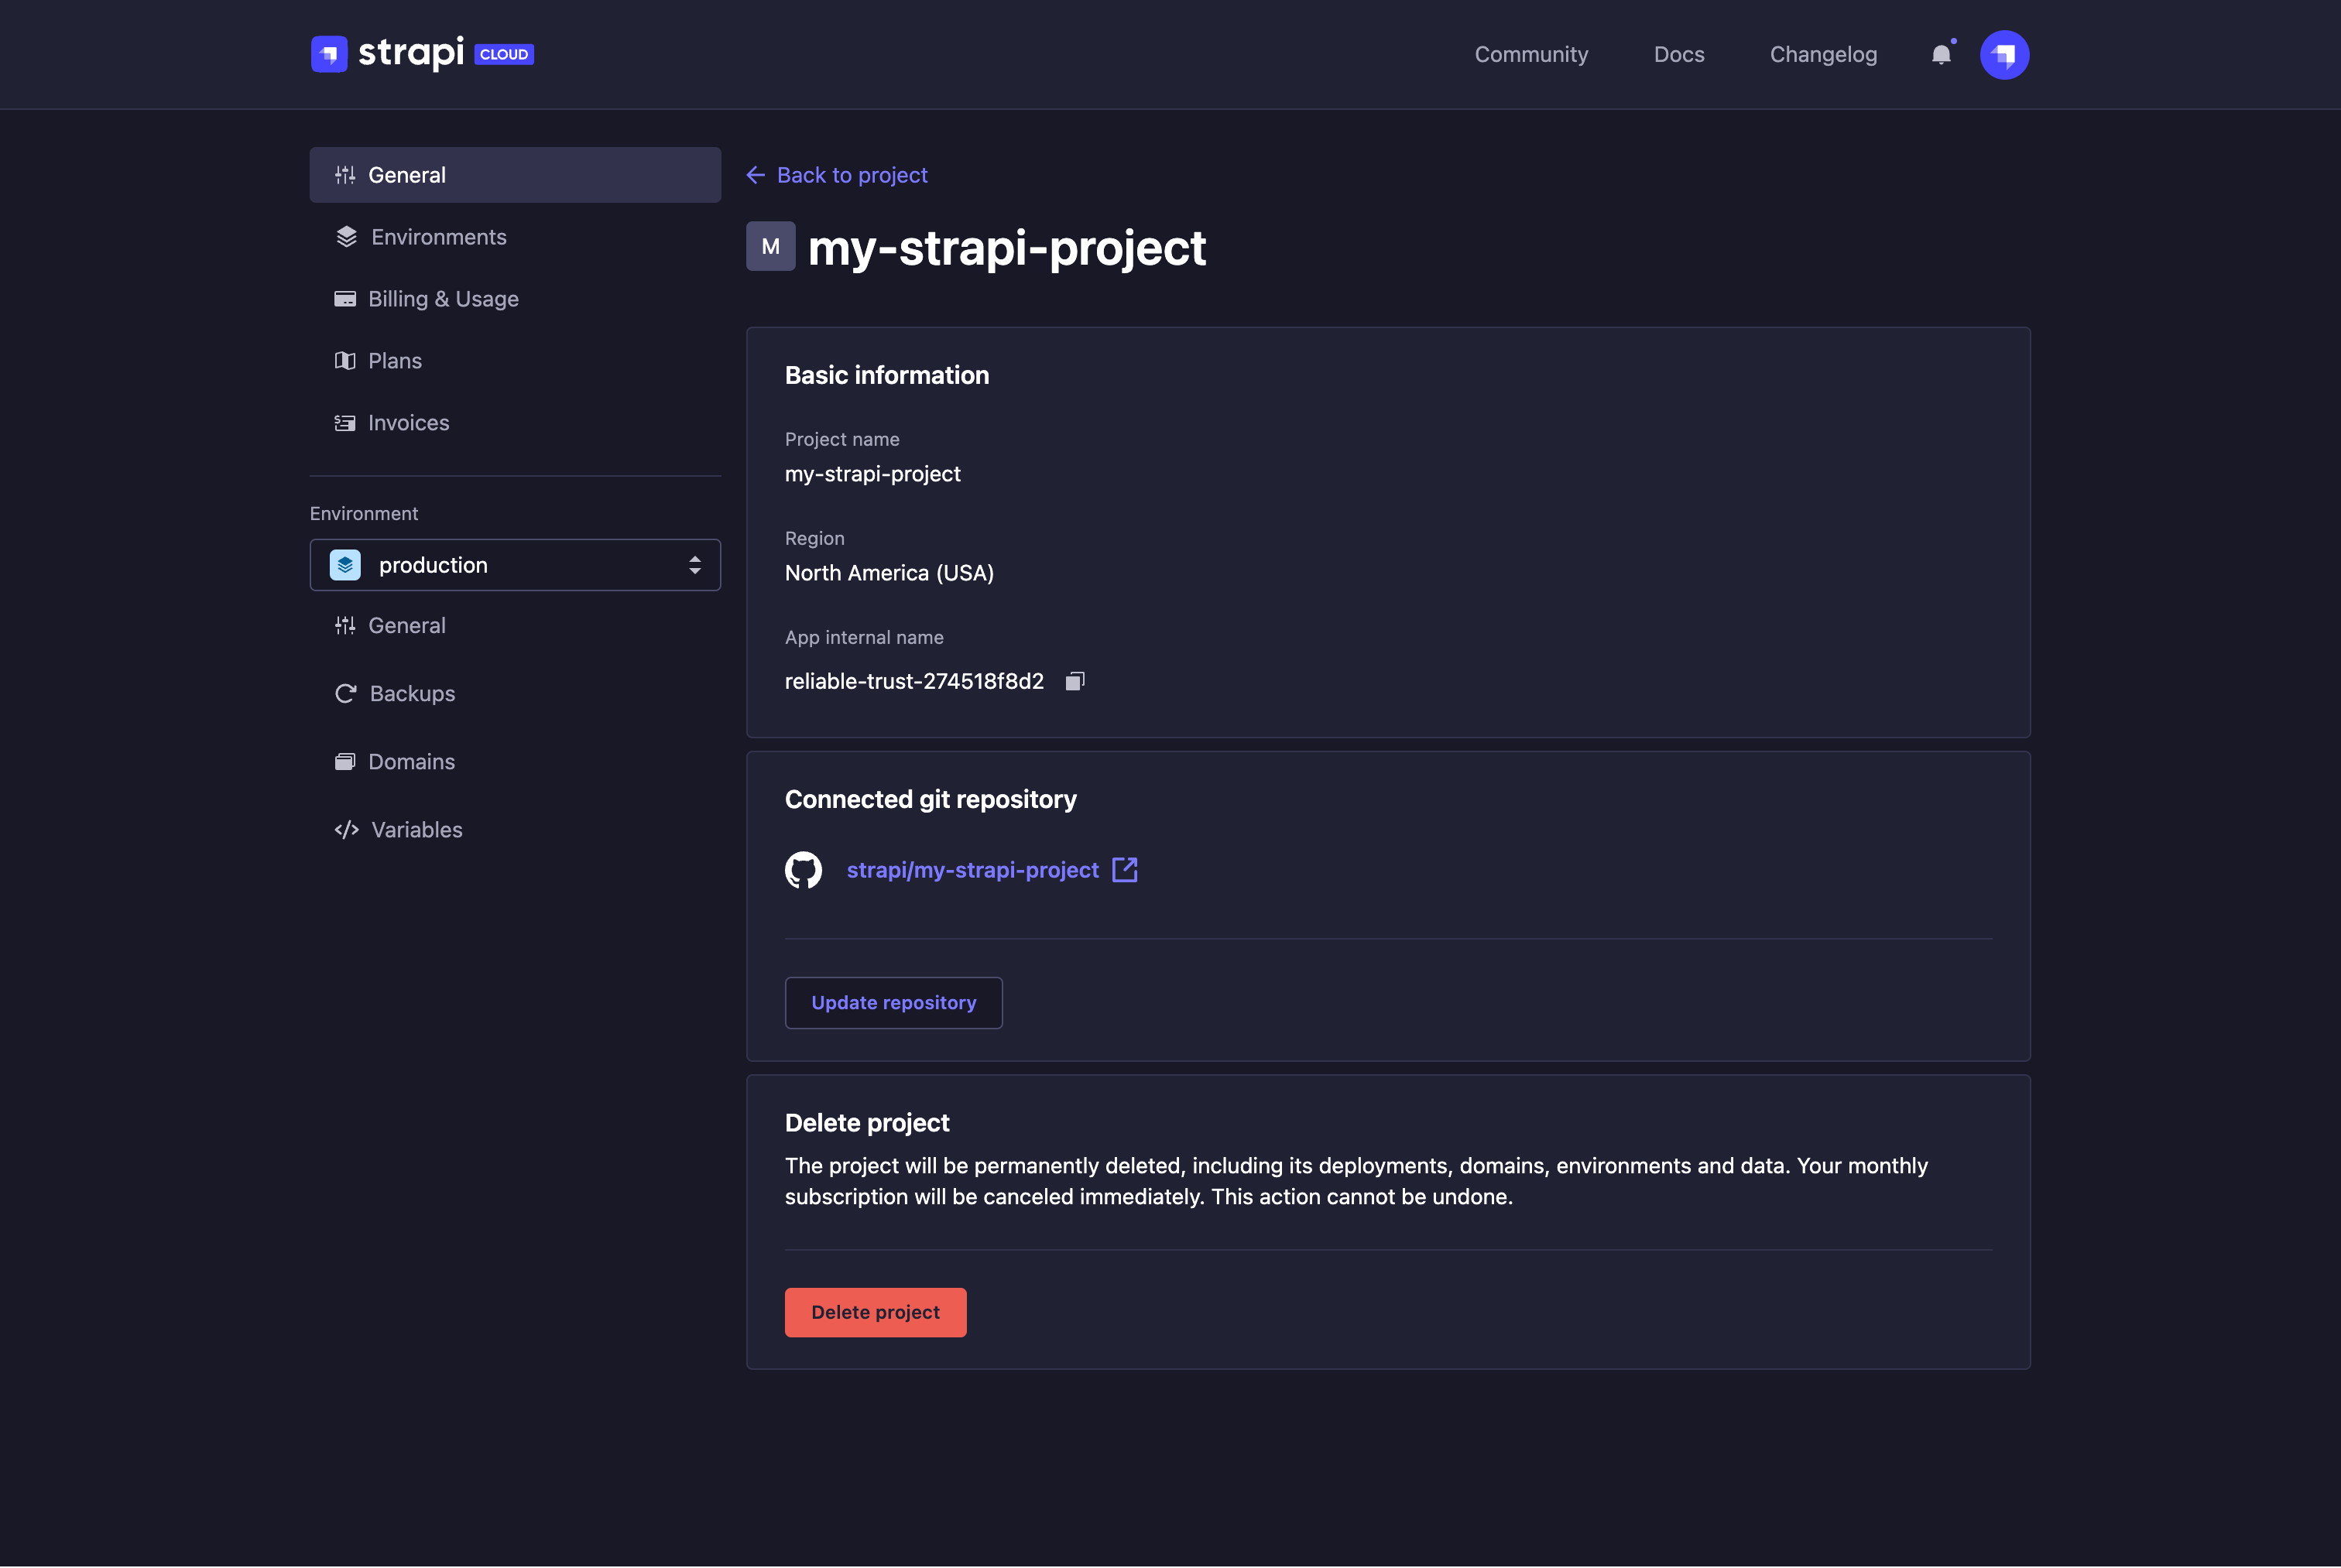
The ![]() General tab for the project-level settings enables you to check and update the following options for the project:
General tab for the project-level settings enables you to check and update the following options for the project:
- Basic information, to see:
- the name of your Strapi Cloud project, used to identify the project on the Cloud Dashboard, Strapi CLI, and deployment URLs. The project name is set at project creation (see Project creation) and cannot be modified afterwards.
- the chosen hosting region for your Strapi Cloud project, meaning the geographical location of the servers where the project and its data and resources are stored. The hosting region is set at project creation (see Project creation) and cannot be modified afterwards.
- the app's internal name for the project, which can be useful for debug & support purposes.
- Connected Git repository: to change the repository and branch used for your project (see Modifying git repository & branch). Also allows to enable/disable the "deploy on push" option.
- Delete project: to permanently delete your Strapi Cloud project (see Deleting Strapi Cloud project).
Modifying git repository & branch
The GitHub or GitLab repository, branch and base directory for a Strapi Cloud project are by default chosen at the creation of the project (see Creating a project). After the project's creation, via the project's settings, it is possible to update the project's repository or switch to another git provider.
Updating the git repository could result in the loss of the project and its data, for instance if the wrong repository is selected or if the data schema between the old and new repository doesn't match.
In the Connected git repository section of the
 General tab, click on the Update repository button. You will be redirected to another interface.
(optional) If you wish to not only update the repository but switch to another git provider, click on the Switch Git provider button at the top right corner of the interface. You will be redirected to the chosen git provider's authorization settings before getting back to the Update repository interface.
In the Update repository section, fill in the 2 available settings:
Setting name Instructions Account Choose an account from the drop-down list. Repository Choose a repository from the drop-down list. In the Select Git branches section, fill in the available settings for any of your environments. Note that the branch can be edited per environment via its own settings, see General (environment).
Setting name Instructions Branch Choose a branch from the drop-down list. Base directory Write the path of the base directory in the textbox. Auto-deploy Tick the box to automatically trigger a new deployment whenever a new commit is pushed to the selected branch. Untick it to disable the option. Click on the Update repository button at the bottom of the Update repository interface.
In the Update repository dialog, confirm your changes by clicking on the Confirm button.
Deleting Strapi Cloud project
You can delete any Strapi Cloud project, but it will be permanent and irreversible. Associated domains, deployments and data will be deleted as well and the subscription for the project will automatically be cancelled.
- In the Delete project section of the General tab, click on the Delete project button.
- In the dialog, select the reason why you are deleting your project. If selecting "Other" or "Missing feature", a textbox will appear to let you write additional information.
- Confirm the deletion of your project by clicking on the Delete project button at the bottom of the dialog.
Environments Strapi Cloud Pro Strapi Cloud Team
The ![]() Environments tab allows to see all configured environments for the Strapi Cloud project, as well as to create new ones. Production is the default environment, which cannot be deleted. Other environments can be created (depending on the subscription plan for your project) to work more safely on isolated instances of your Strapi Cloud project (e.g. a staging environment where tests can be made before being available on production).
Environments tab allows to see all configured environments for the Strapi Cloud project, as well as to create new ones. Production is the default environment, which cannot be deleted. Other environments can be created (depending on the subscription plan for your project) to work more safely on isolated instances of your Strapi Cloud project (e.g. a staging environment where tests can be made before being available on production).
Clicking on the Manage button for any environment will redirect you to the environment's own general settings, where it is possible to change the Node version, edit the git branches and delete or reset the environment. Please refer to the dedicated documentation for more information.
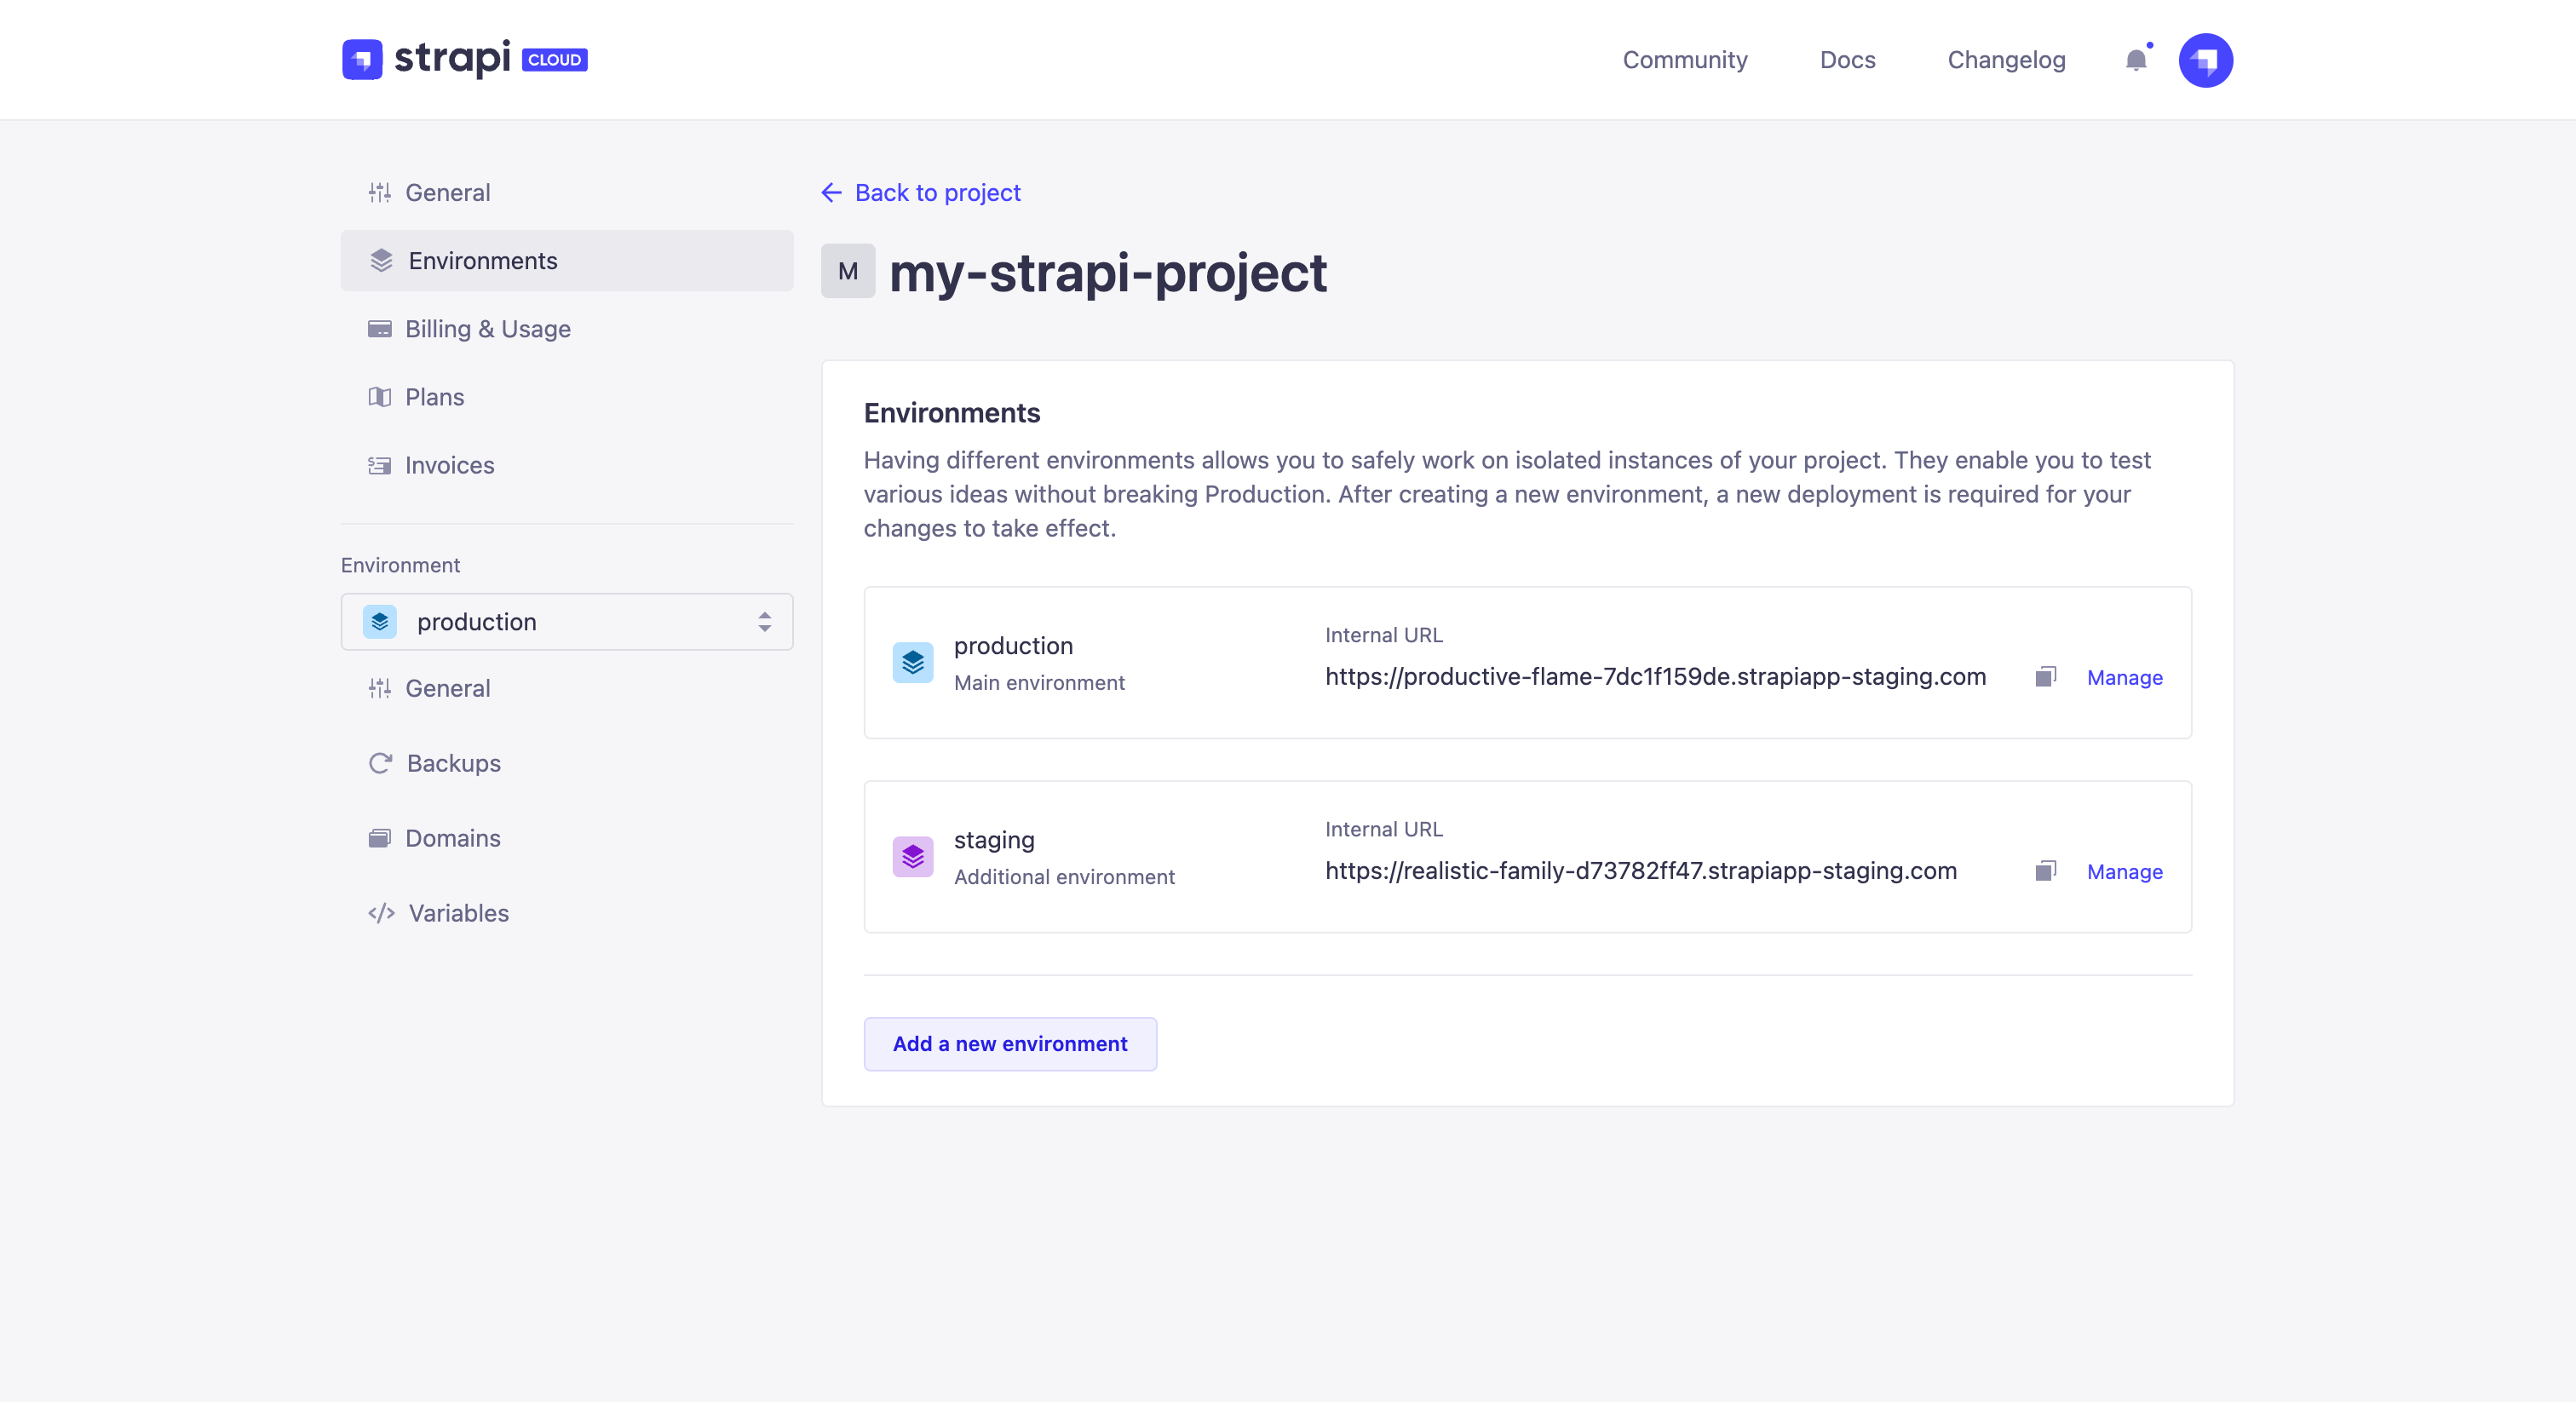
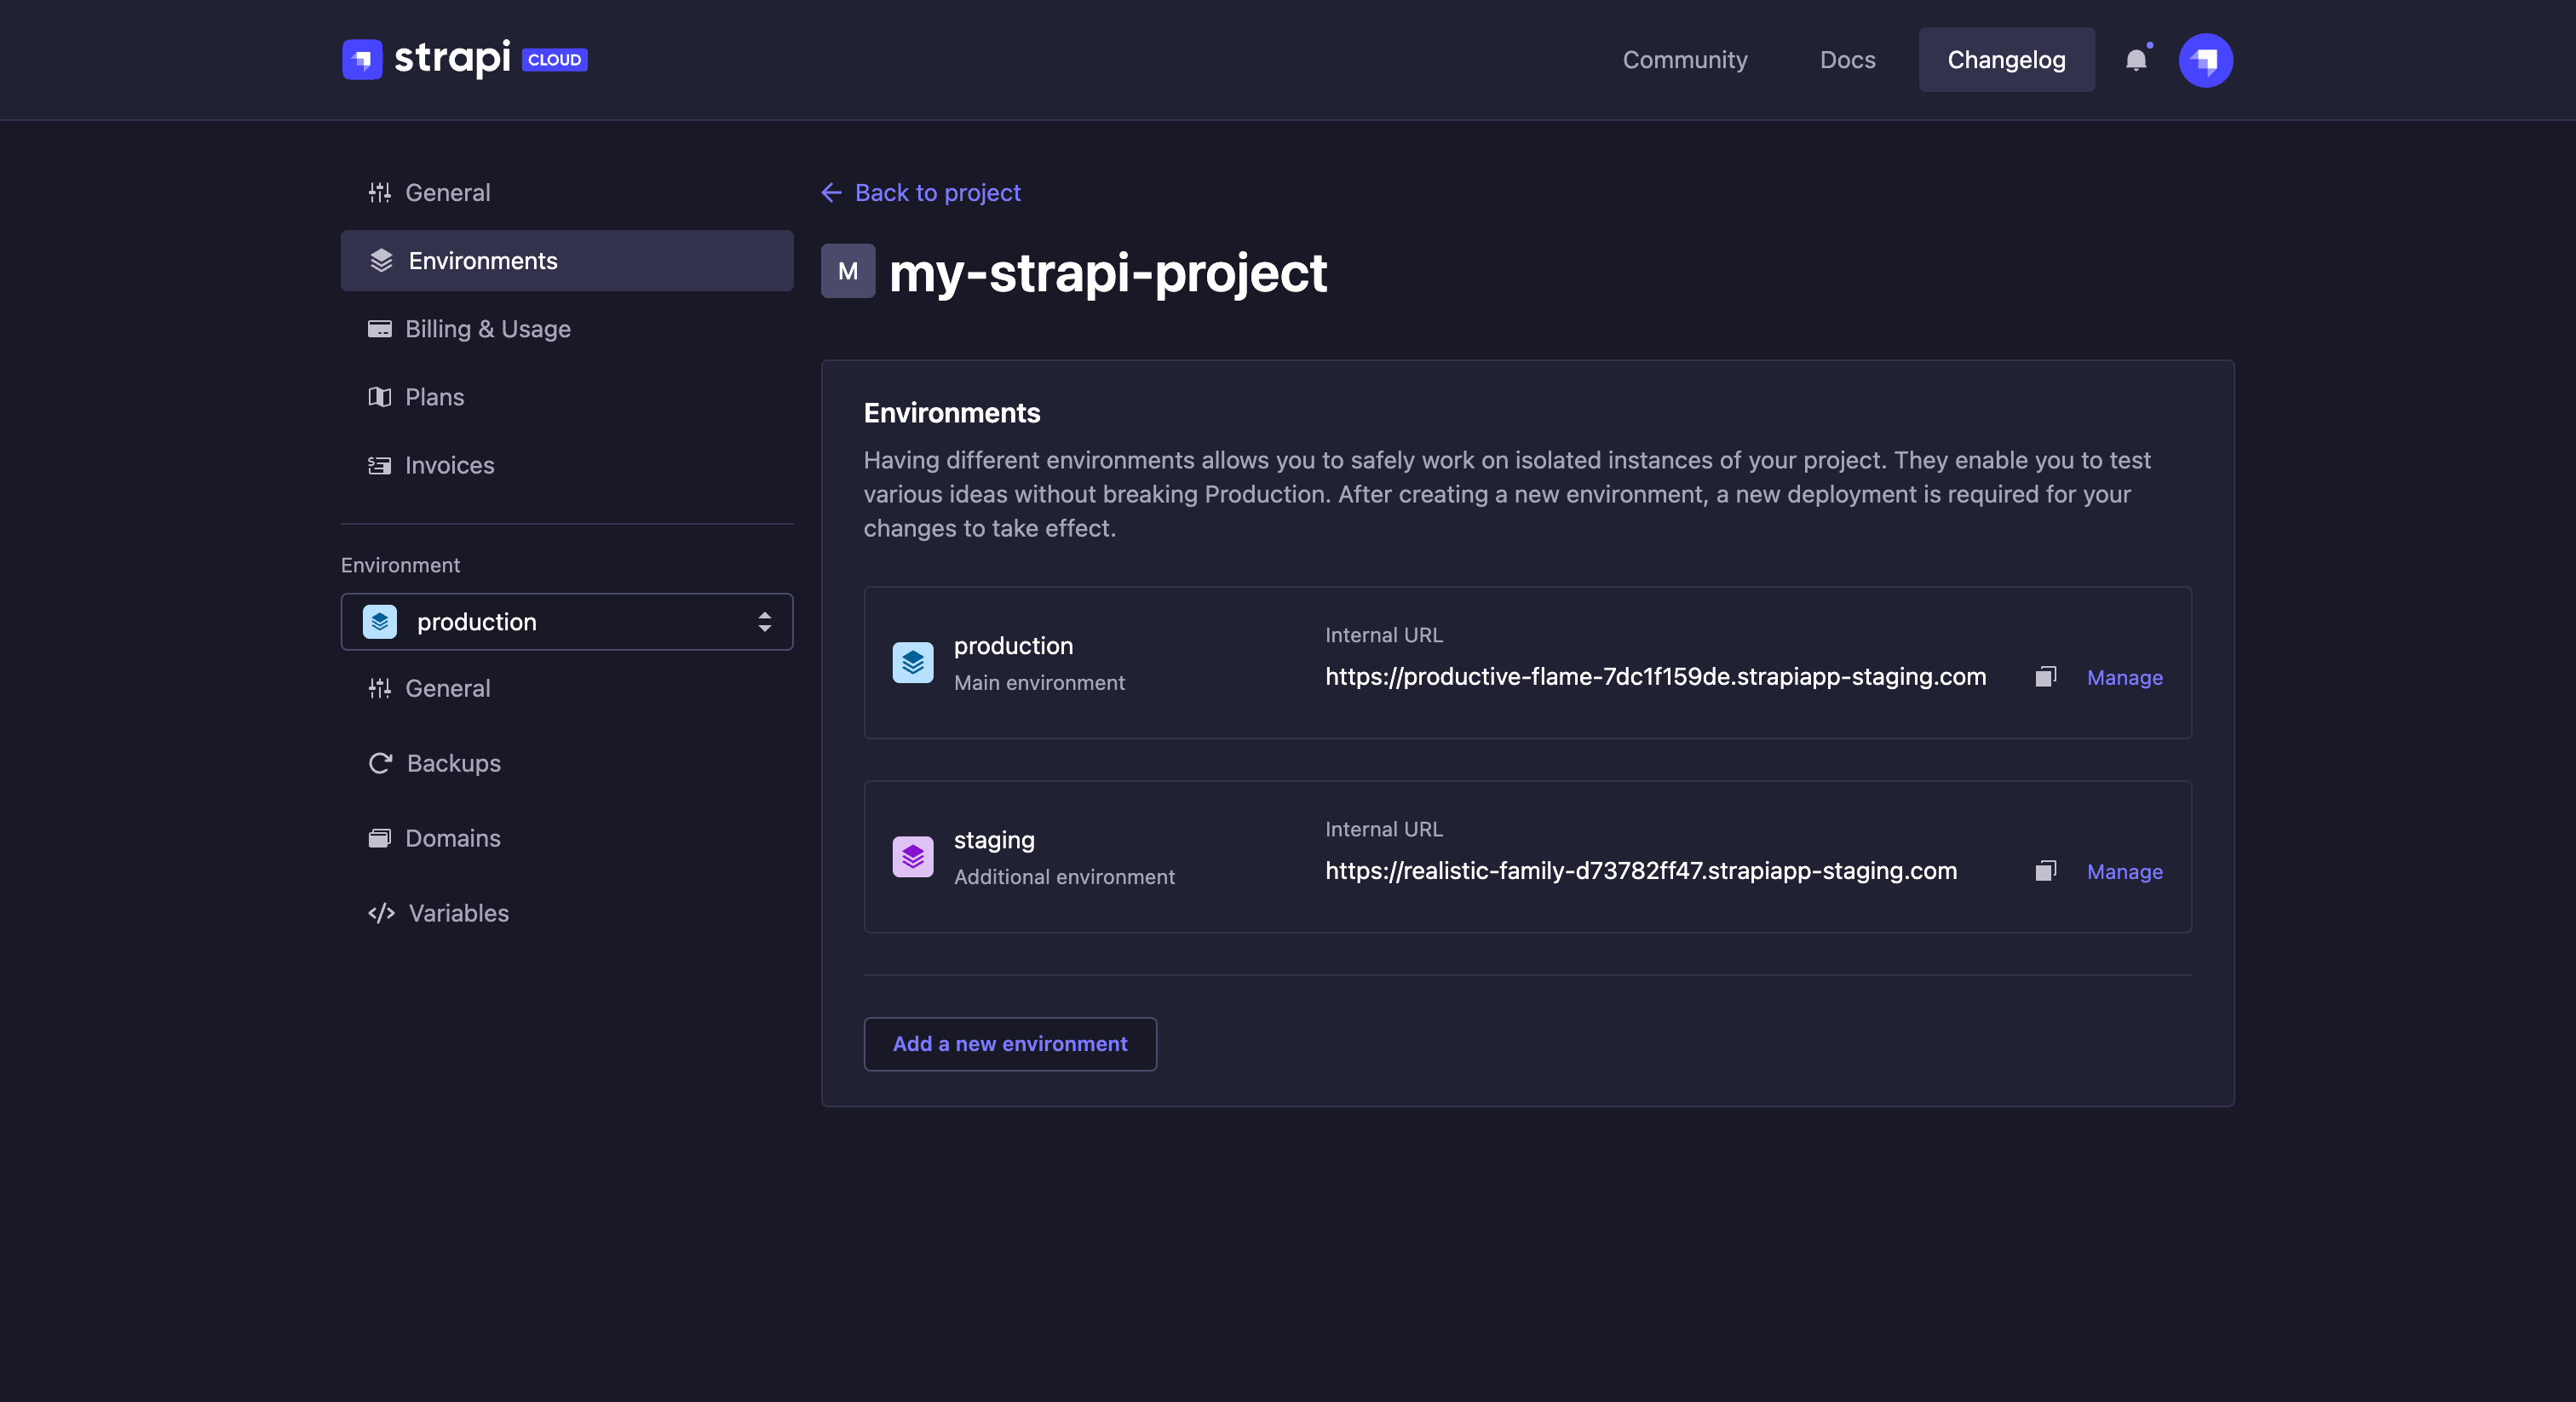
To create a new environment:
Click on the Add a new environment button.
In the dialog that opens, you can see the price for the new environment and the date of the next invoice.
Fill in the available settings:
Setting name Instructions Environment name (mandatory) Write a name for your project's new environment. Git branch (mandatory) Select the right branch for your new environment. Base directory Write the name of the base directory of your new environment. Auto-deploy Tick the box to automatically trigger a new deployment whenever a new commit is pushed to the selected branch. Untick it to disable the option. Click on the Add environment button to create your project's new environment. A new deployment will automatically be triggered.
If the creation of a new environment fails but you are still charged, try creating the environment again. This time, the environment creation should be successful and you will not be charged a second time. This behaviour is an known issue that should be fixed in the upcoming weeks.
Billing & Usage
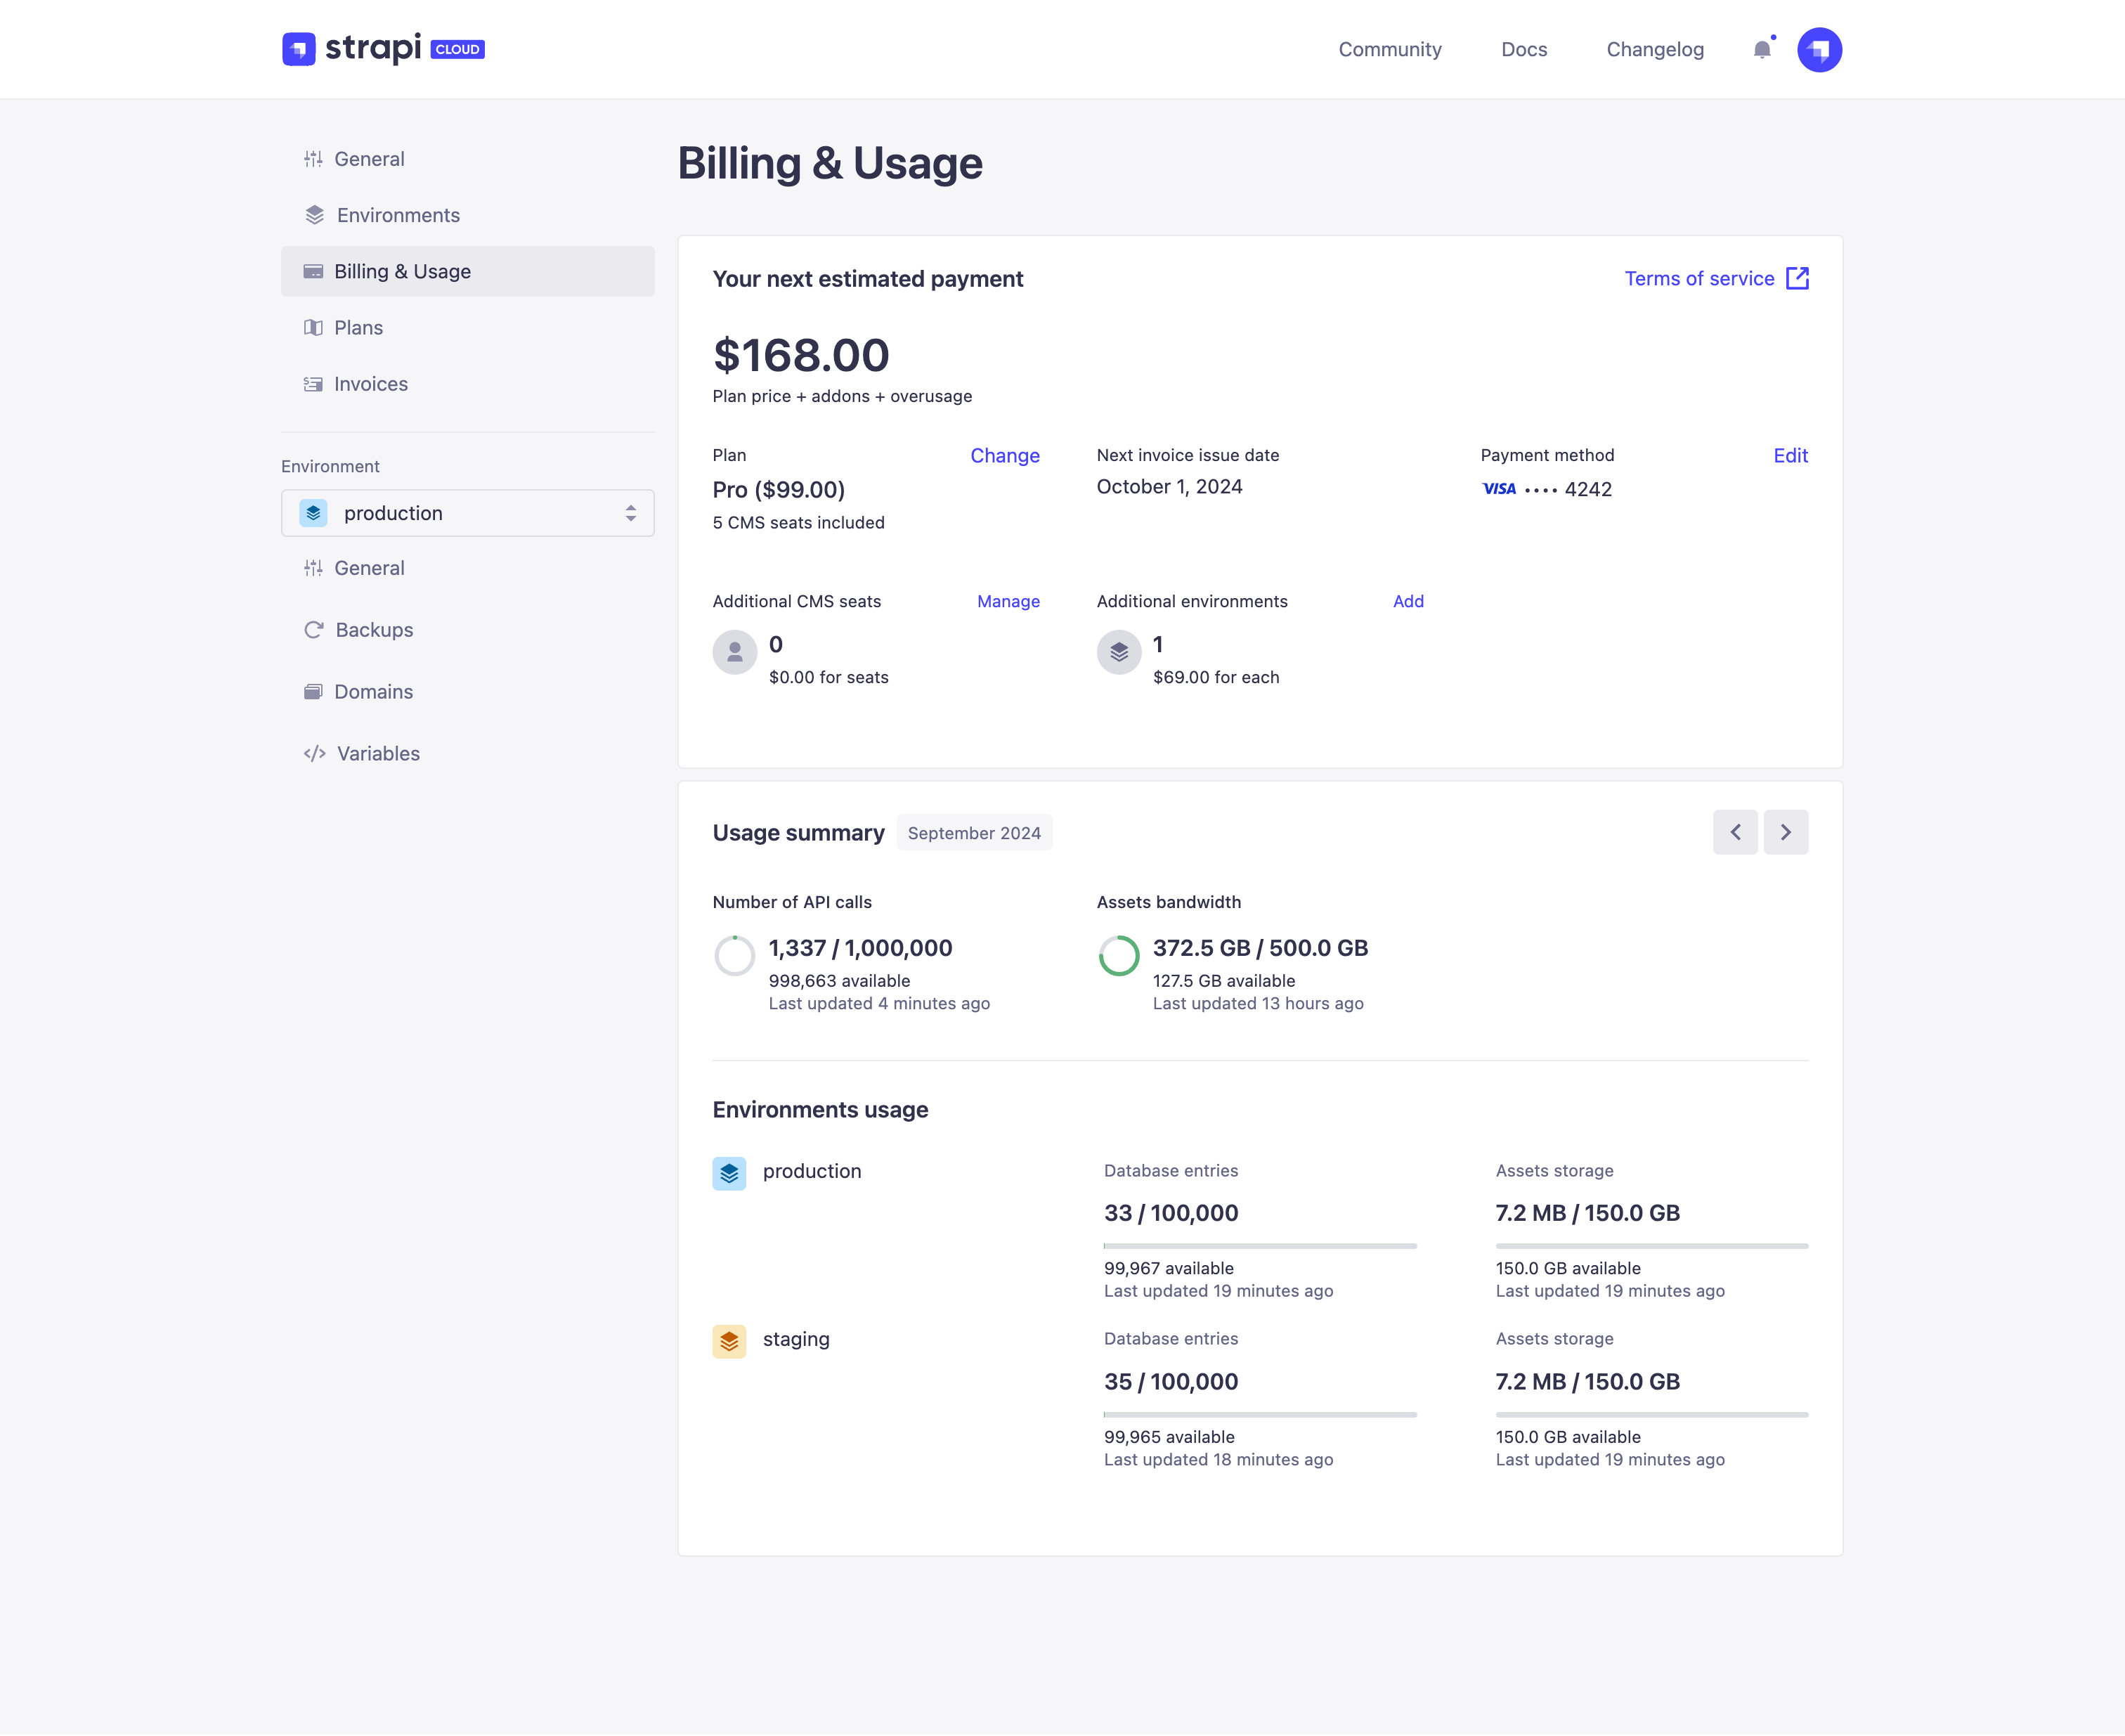
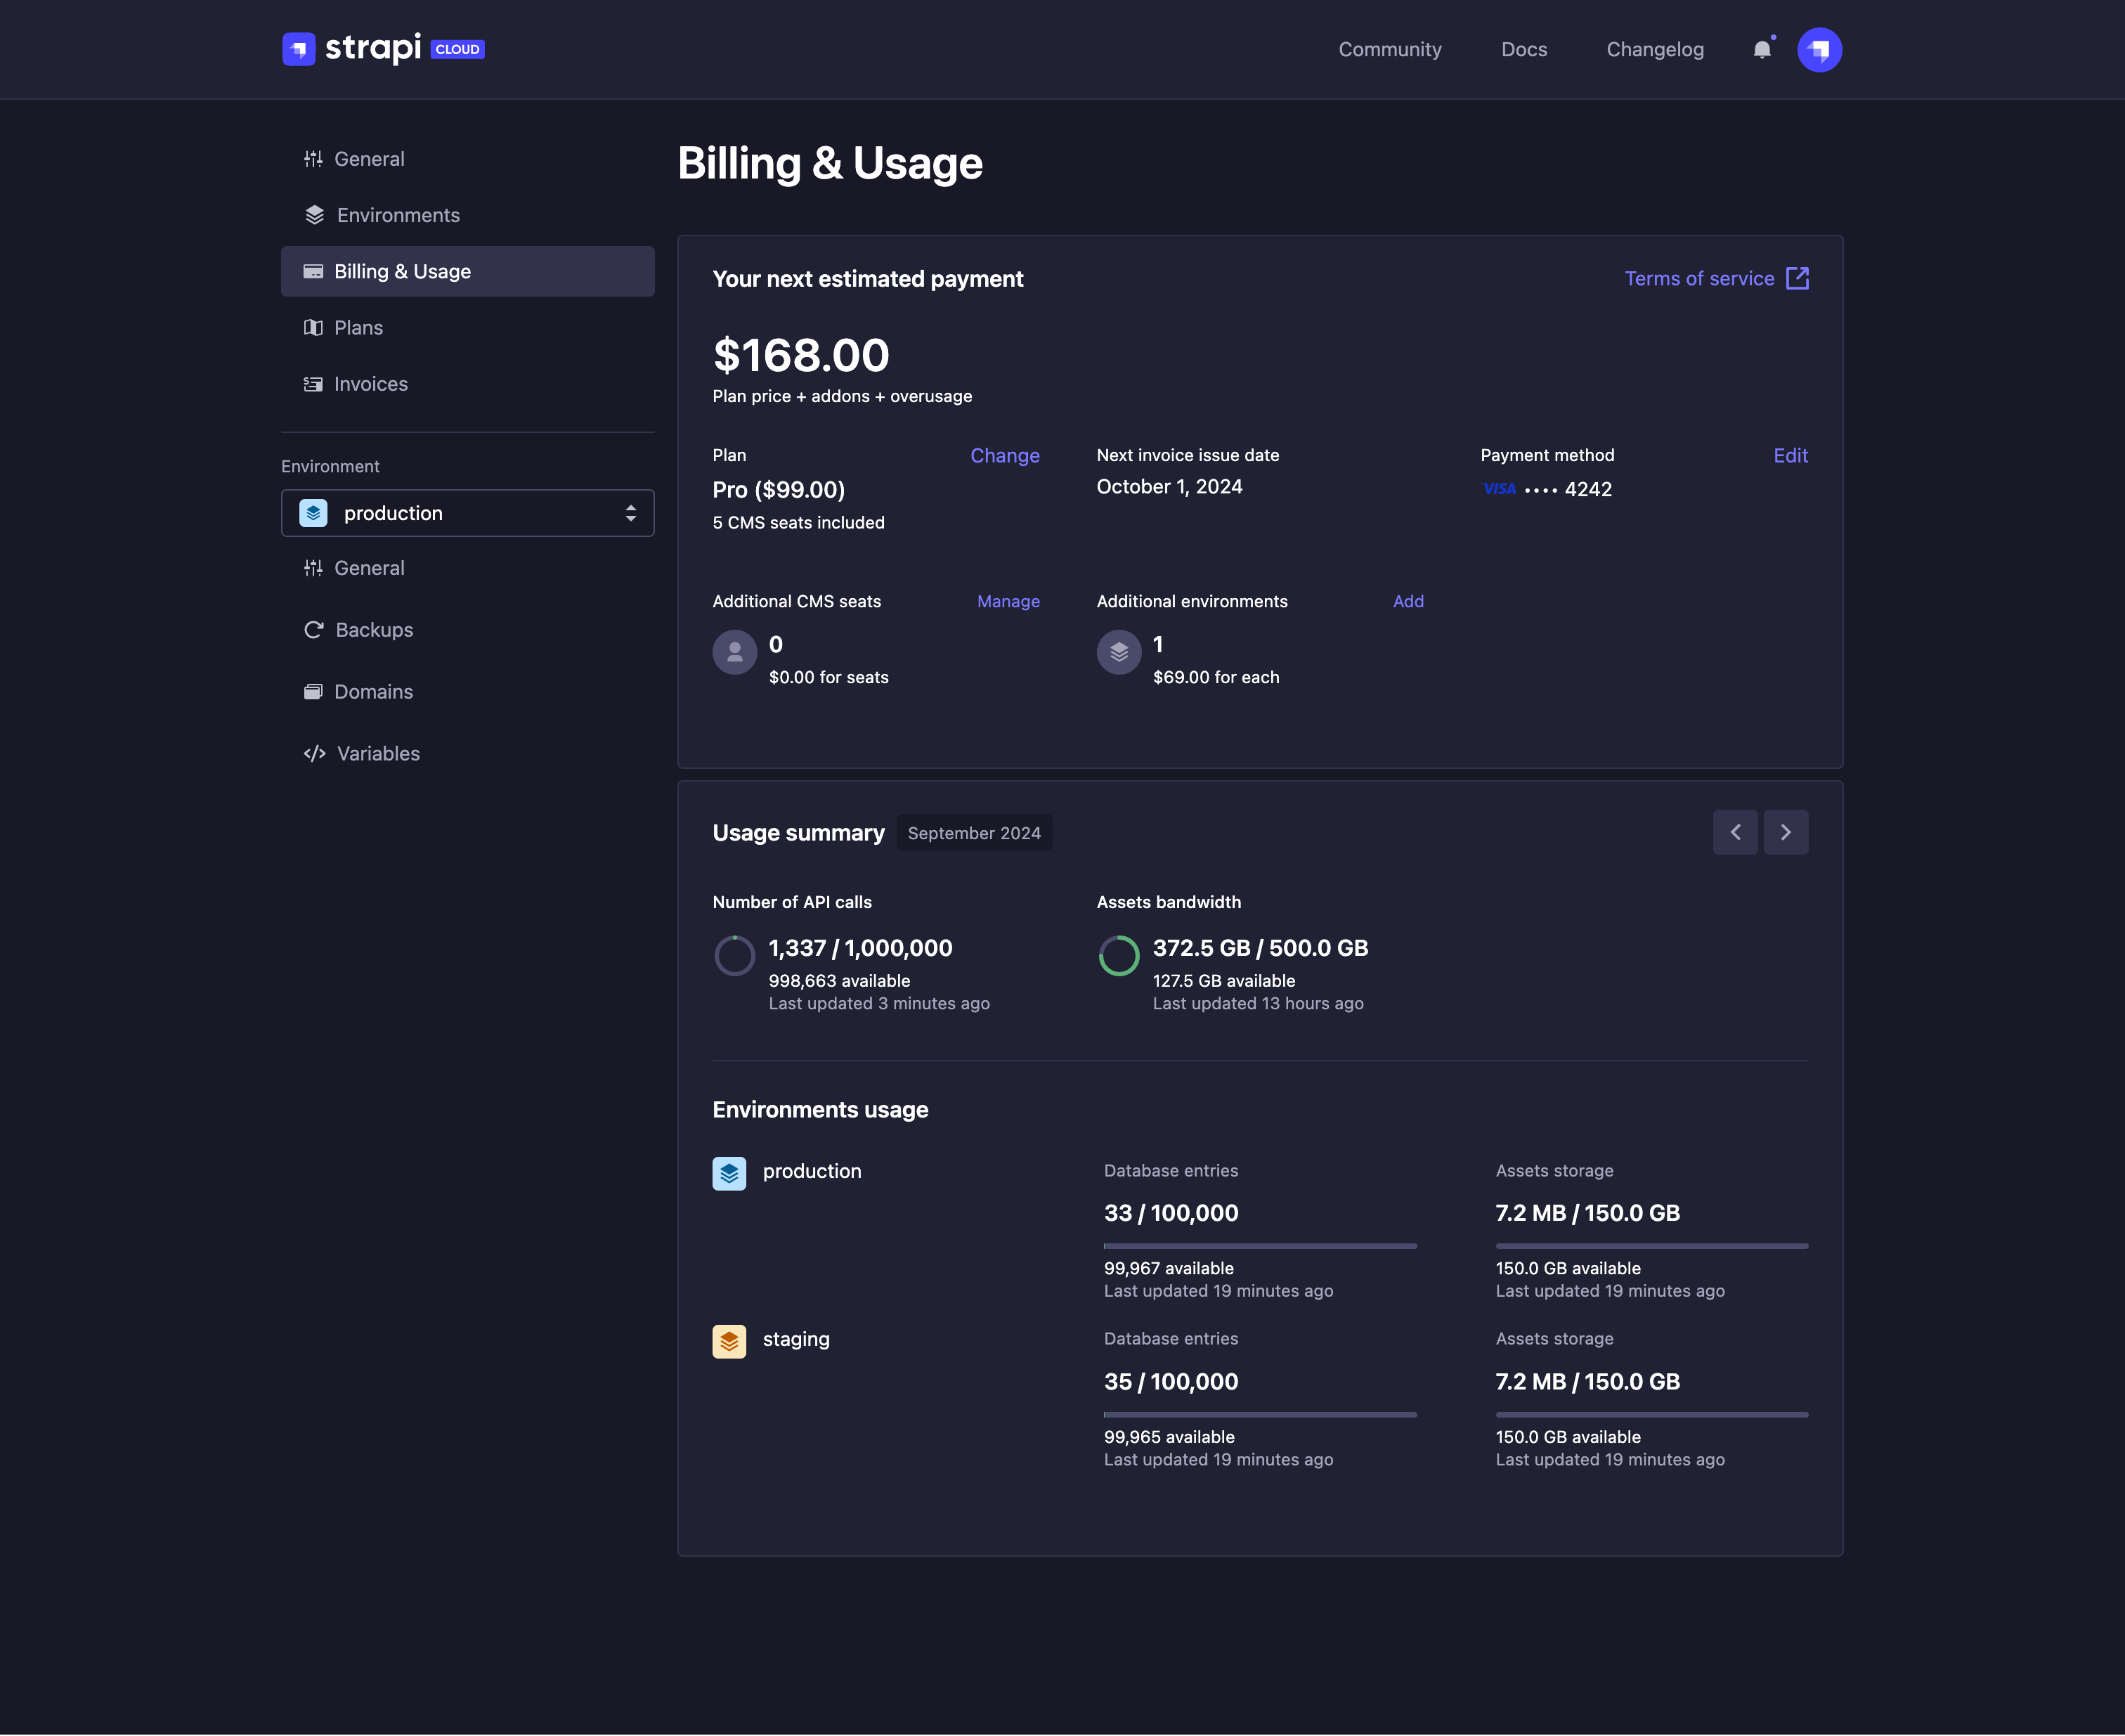
The ![]() Billing & Usage displays your next estimated payment, all information on the current subscription plan and a detailed summary of the project's and its environments' usage. It also allows you to directly manage the number of seats and add new environments (please refer to the documentation in the Environments section) for your project.
Billing & Usage displays your next estimated payment, all information on the current subscription plan and a detailed summary of the project's and its environments' usage. It also allows you to directly manage the number of seats and add new environments (please refer to the documentation in the Environments section) for your project.
Through this tab, you also have the possibility to:
- click the Change button to be redirected to the
 Plans tab, where you can change you subscription plan (see related documentation),
 - click the Edit button to be redirected to the
 Billing tab of your profile page, where you can edit the payment method (see related documentation).
In the Usage section of the ![]() Billing & Usage tab, you can see the current monthly usage of your project compared to the maximum usage allowed by your project's subscription. Use the arrows in the top right corner to see the project's usage for any chosen month.
Billing & Usage tab, you can see the current monthly usage of your project compared to the maximum usage allowed by your project's subscription. Use the arrows in the top right corner to see the project's usage for any chosen month.
Note also that if your usage indicates that another subscription plan would fit better for your project, a message will be displayed in the ![]() Billing & Usage tab to advise which plan you could switch to.
Billing & Usage tab to advise which plan you could switch to.
Managing project's number of seats
You can manually add more seats or lower the number of seats for your project without necessarily upgrading or downgrading to another plan (see full documentation on seats management).
Adding more seats for the project
- In the Billing & Usage tab of your project's settings, click on the Manage button next to the displayed number of seats.
- In the window that opens, select with the drop-down the number of Additional seats of your choice. The cost of the additional seats is automatically calculated and displayed in the window.
- (optional) Click I have a discount code, enter your discount code in the field, and click on the Apply button.
- Click the Save button to confirm. You will automatically be billed with the payment method defined in your profile.
Removing seats from the project
- In the Billing & Usage tab of your project's settings, click on the Manage button next to the displayed number of seats.
- In the window that opens, select with the drop-down the number of Billed seats you want to keep.
- Click the Save button to confirm. The new, lower number of seats will not be effective until the next month.
Plans
The ![]() Plans tab displays an overview of the available Strapi Cloud plans and allows you to upgrade or downgrade from your current plan to another.
Plans tab displays an overview of the available Strapi Cloud plans and allows you to upgrade or downgrade from your current plan to another.
If you are using the free trial, the Plan tab shows a countdown of how many days you have left, as well as indications of the next steps. For more information about the free trial and project suspension, please refer to Information on billing & usage.
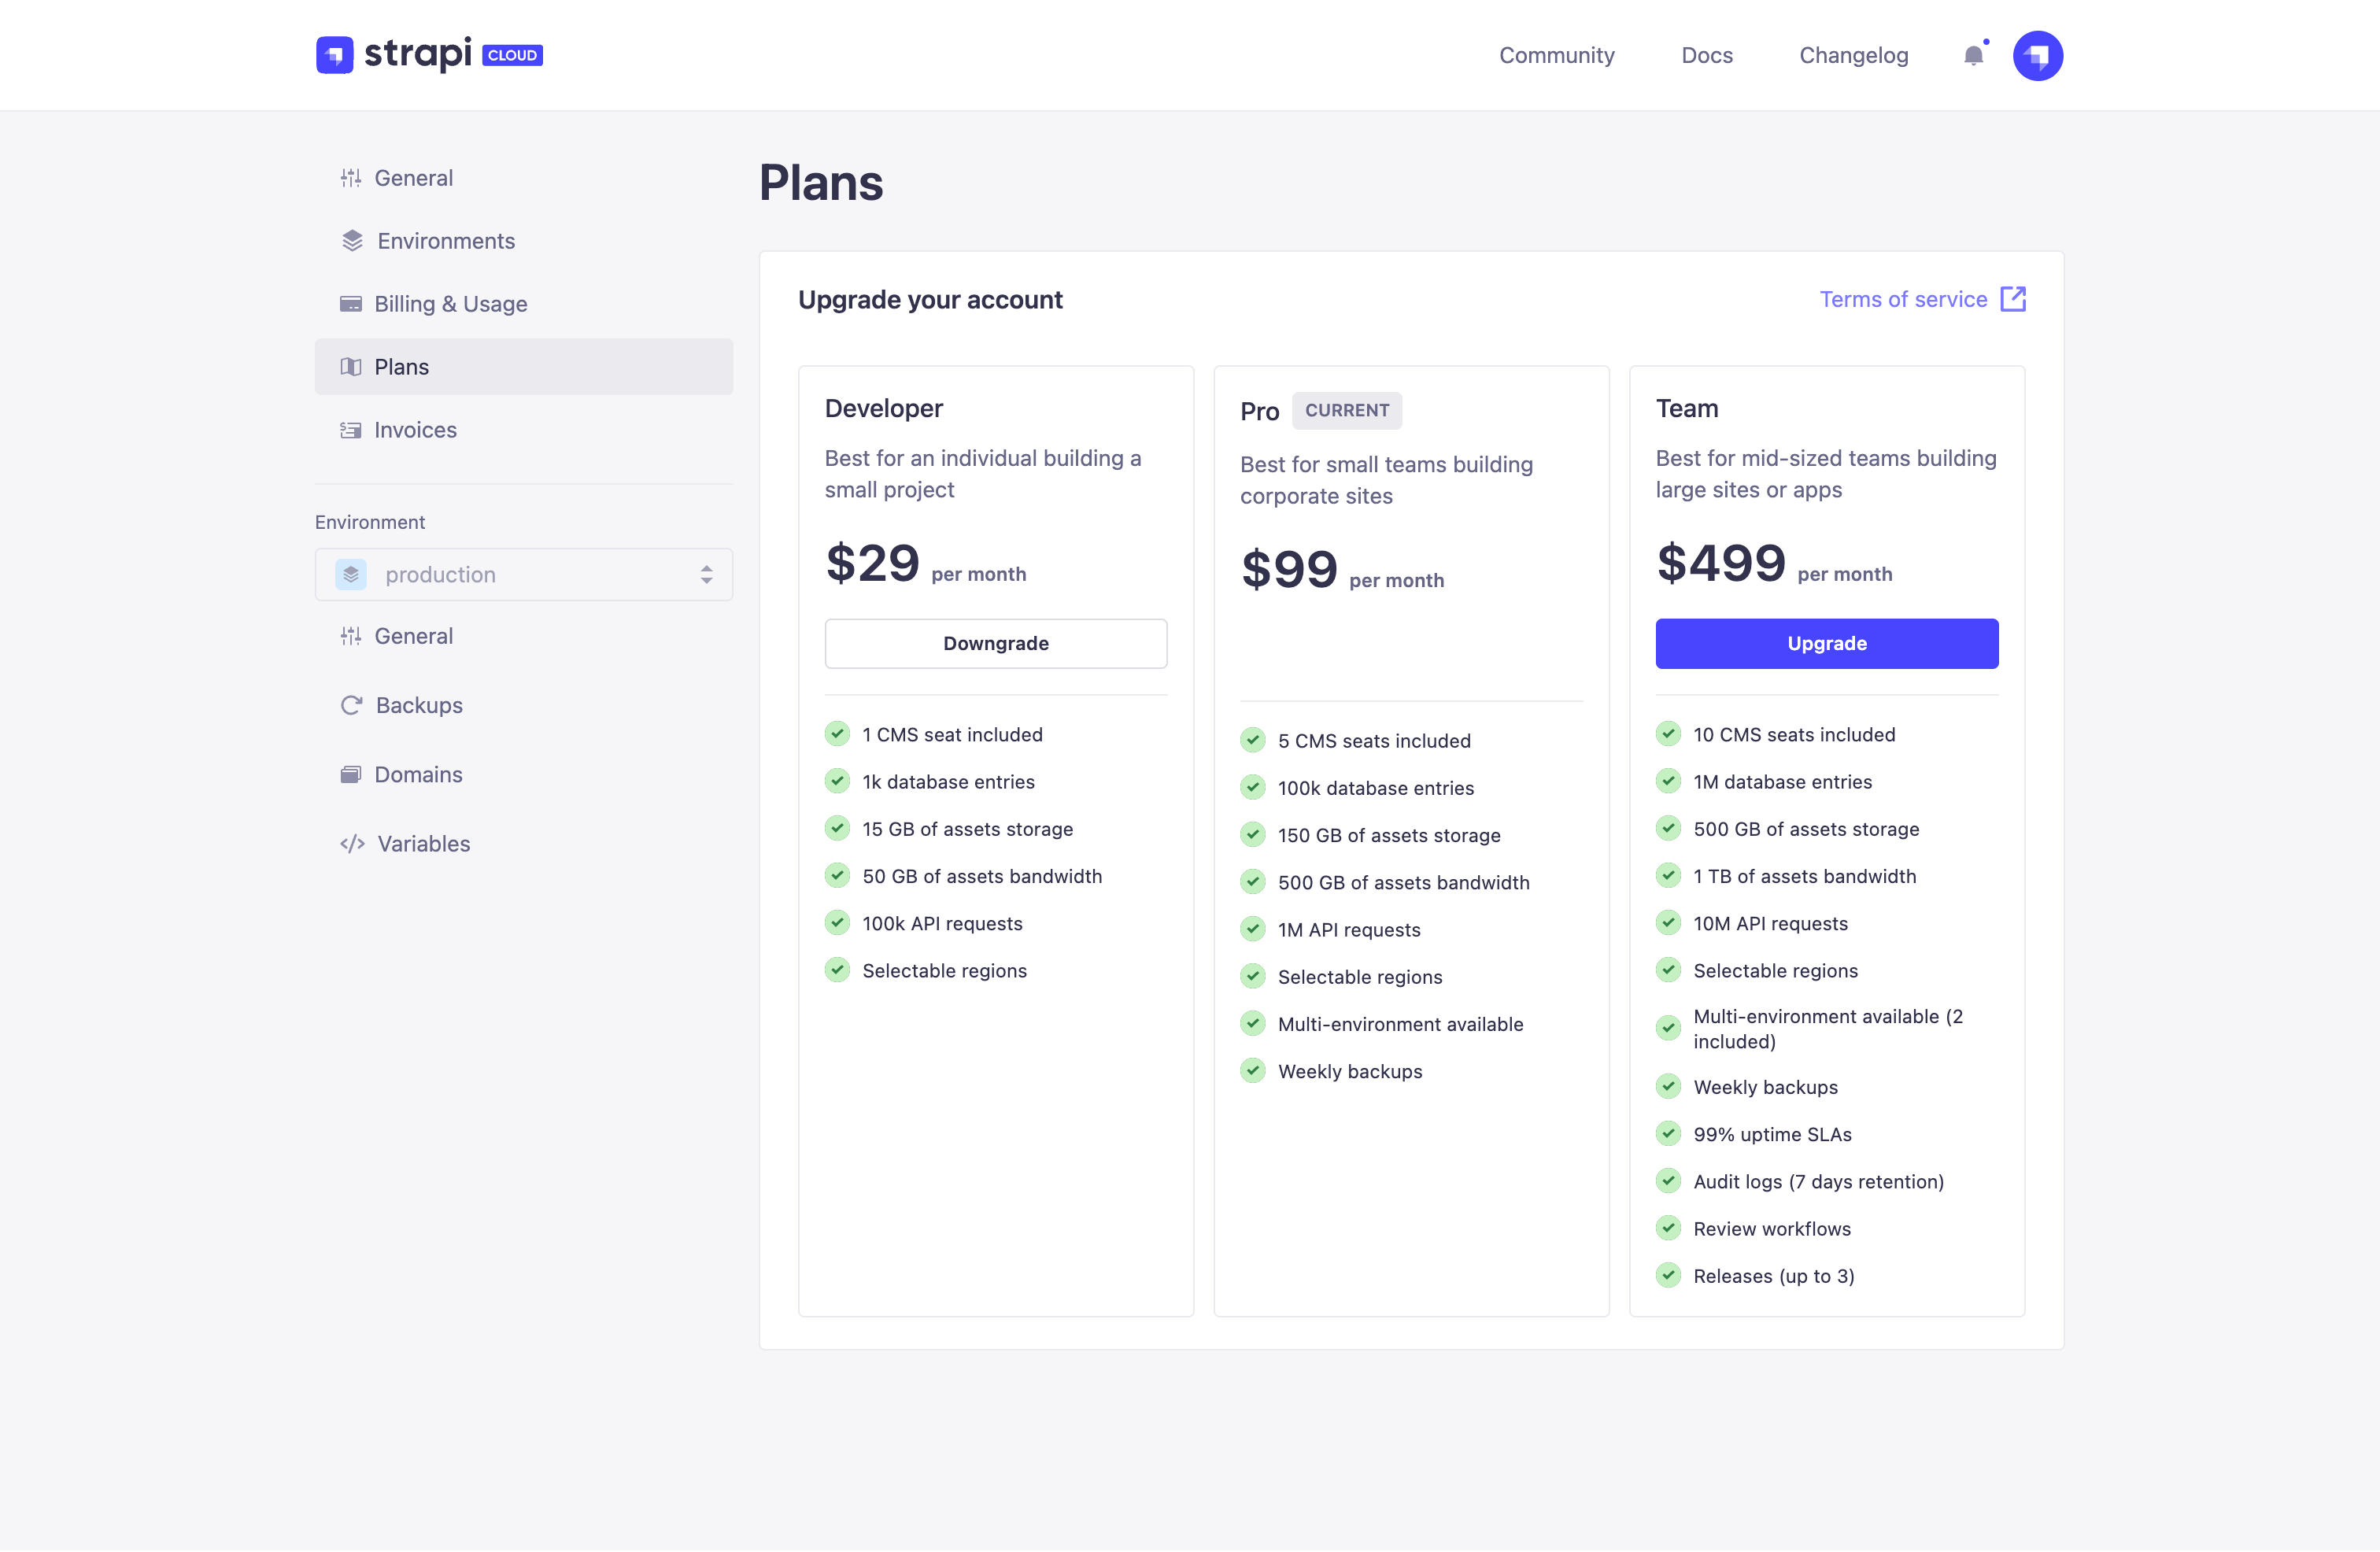
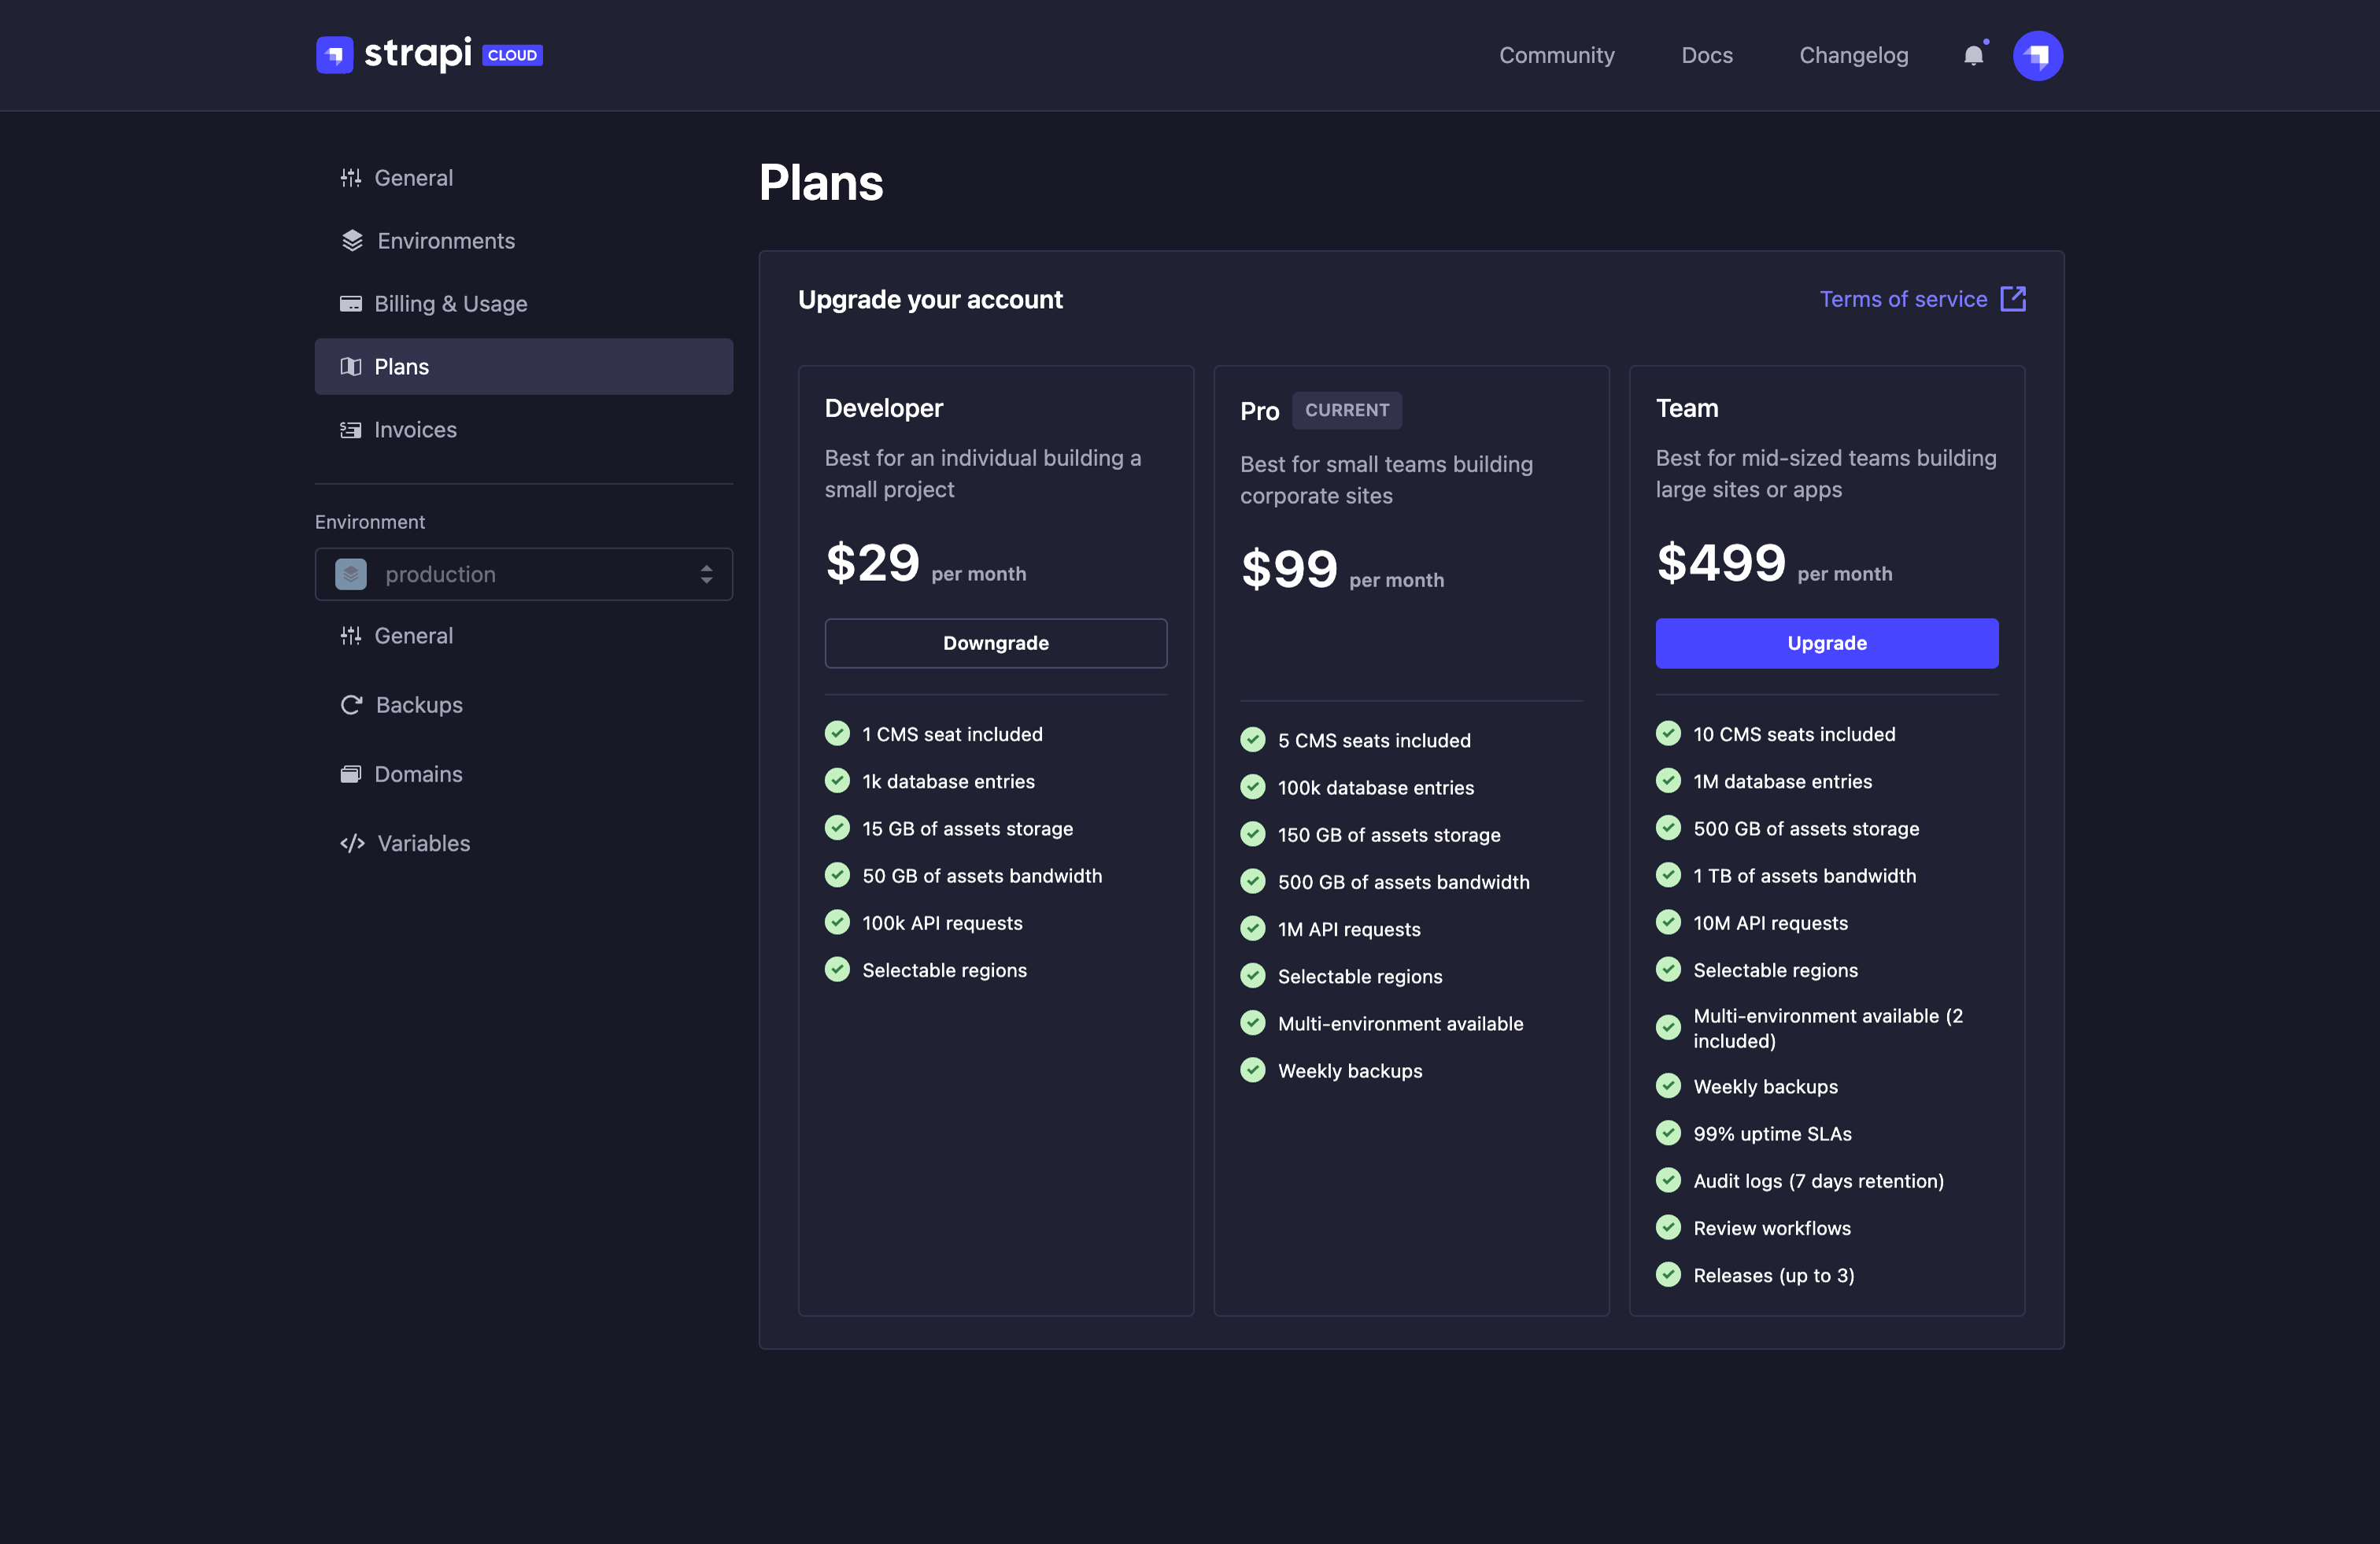
Upgrading to another plan
Strapi Cloud plan upgrades to another, higher plan are immediate and can be managed for each project via the project settings.
When using the free trial, the buttons to upgrade to another plan are greyed out and unusable until you have filled in your billing information. Please refer to Account billing details for more information.
To upgrade your current plan to a higher one:
In the
Plans tab of your project's settings, click on the Upgrade button of the plan you want to upgrade to.In the window that opens, check the payment details that indicate how much you will have to pay immediately after confirming the upgrade, and the available options.
a. (optional) Click the Edit button to select another payment method. b. (optional) Click I have a discount code, enter your discount code in the field, and click on the Apply button.
Click on the Upgrade to [plan name] button to confirm the upgrade of your Strapi project to another plan.
Downgrading to another plan
Strapi Cloud plan downgrades can be managed for each project via the project settings. Downgrades are however not immediately effective: the higher plan will still remain active until the end of the current month (e.g. if you downgrade from the Team plan to the Pro plan on June 18th, your project will remain on the Team plan until the end of the month: on July 1st, the Pro plan will be effective for the project).
Make sure to check the usage of your Strapi Cloud project before downgrading: if your current usage exceeds the limits of the lower plan, you are taking the risk of getting charged for the overages. You may also lose access to some features: for example, downgrading to the Developer plan which doesn't include the Backups feature, would make you lose all your project's backups. Please refer to Information on billing & usage for more information.
Note also that you cannot downgrade if you have additional environments (i.e. extra environments that have been purchased, not the default or included environments). For instance, if you wish to downgrade from the Pro plan to the Developer plan, you first need to delete all additional environments that have been configured (see Resetting & Deleting environment), for the Downgrade button to be displayed and available again.
To downgrade your current plan to a lower one:
- In the Plans tab of your project's settings, click on the Downgrade button of the plan you want to downgrade to.
- In the window that opens, check the information related to downgrading.
- Click on the Downgrade button to confirm the downgrade of your Strapi project's plan.
Downgrades are effective from the 1st of the following month. Before that date, you can click on the Cancel downgrade button to remain on the current plan.
Invoices
The ![]() Invoices tab displays the full list of invoices for your Strapi Cloud project as well as their status.
Invoices tab displays the full list of invoices for your Strapi Cloud project as well as their status.
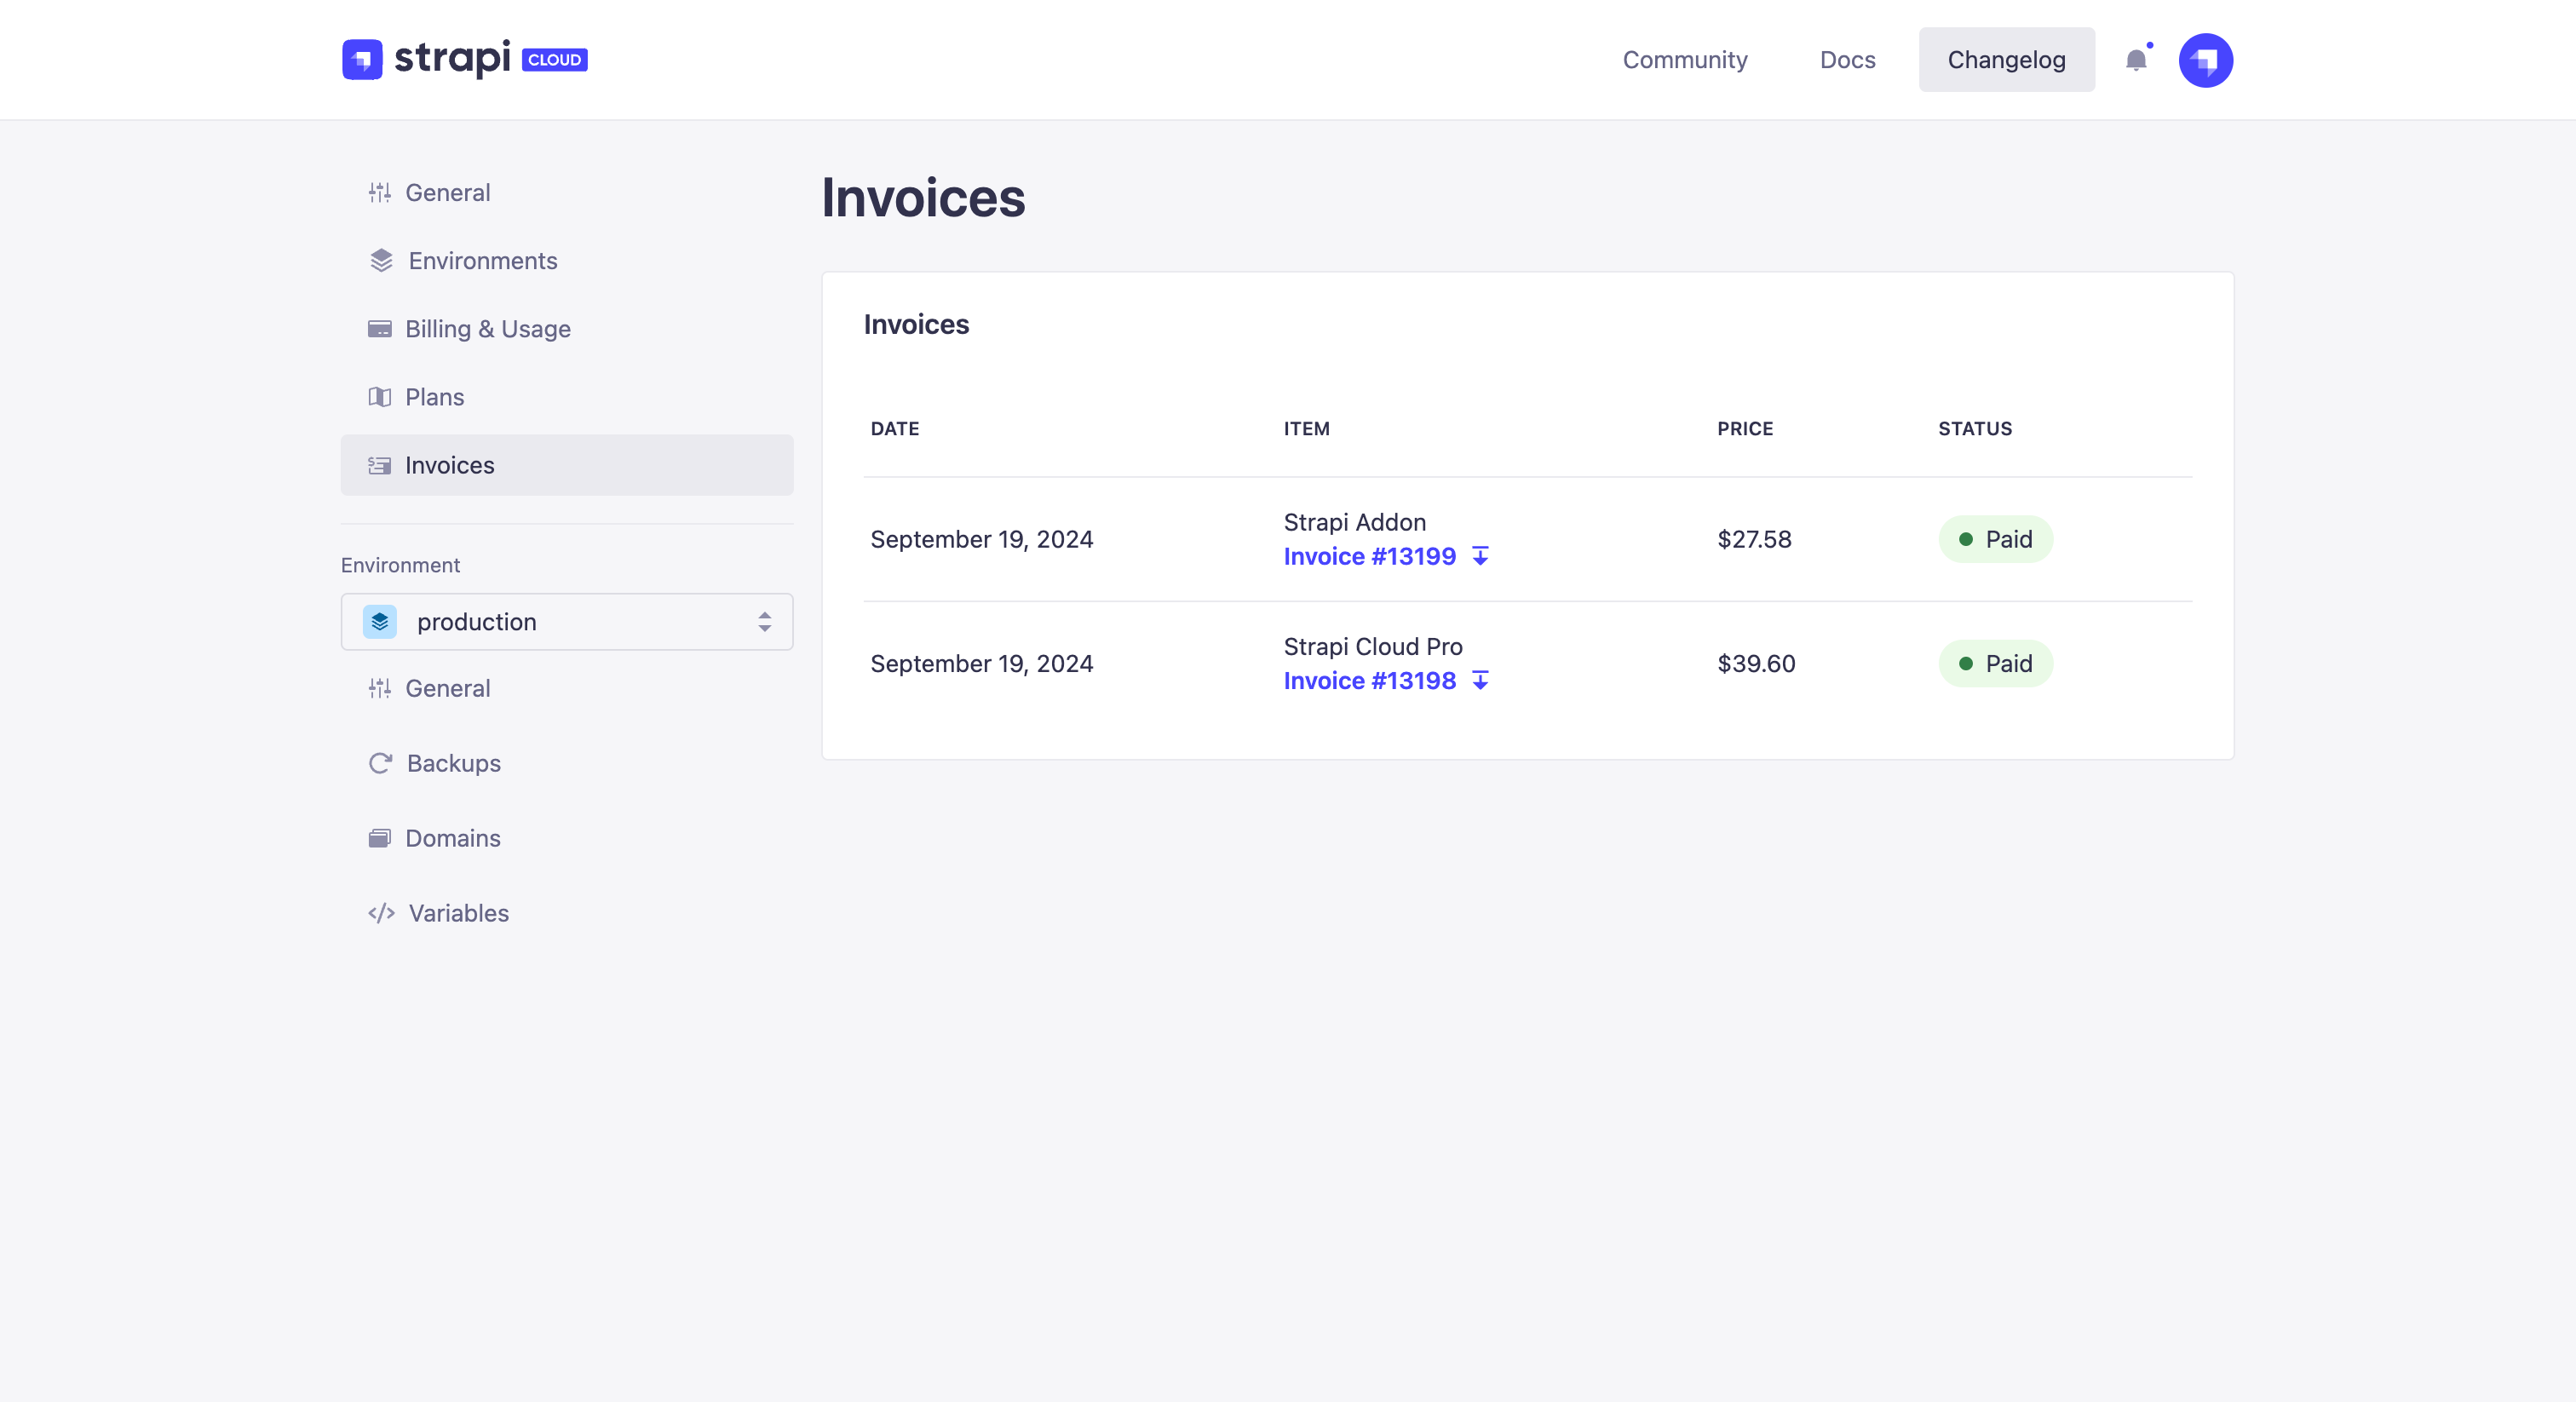
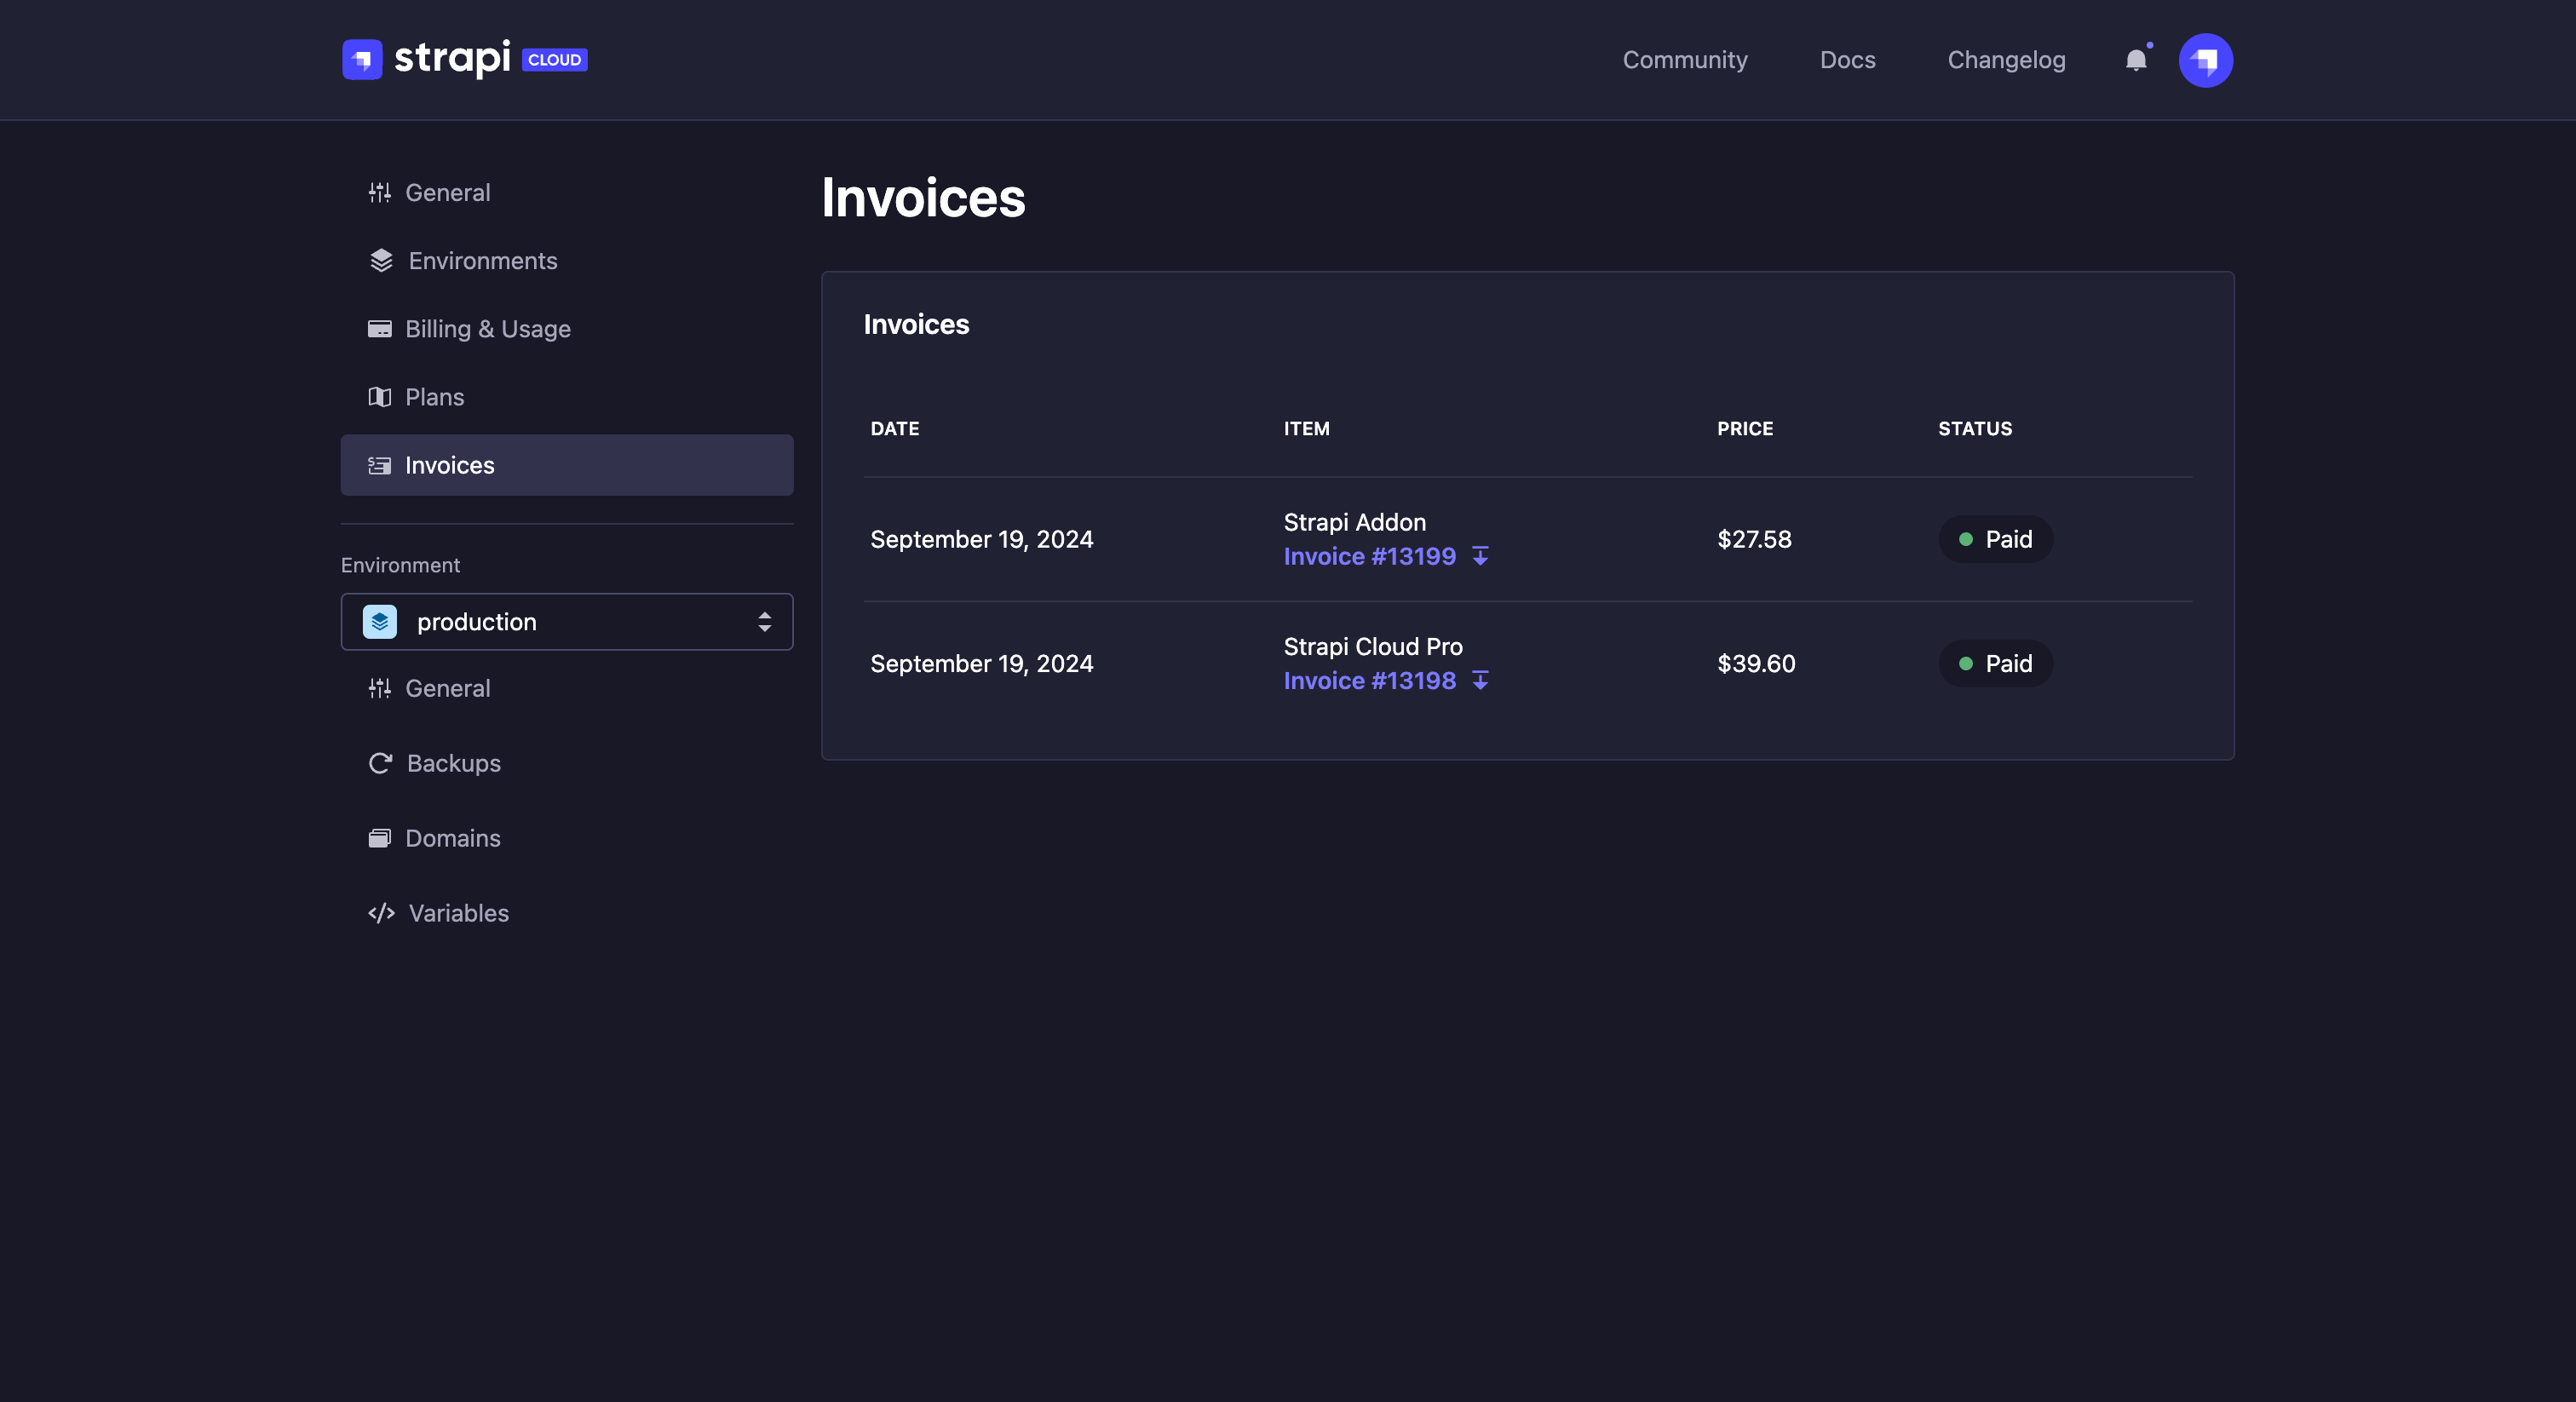
Invoices can have any of the following statuses:
- Paid: the payment has been done and the invoice is available, no additional action is required.
- Payment pending: the invoice is not complete or validated yet
- Payment due: the paiement didn't go through and needs to be fixed
- Not paid: the payment has failed and won't automatically be retried
- Voided: the invoice has been cancelled.
Click the ![]() icon to download an invoice.
icon to download an invoice.
In the Profile > Invoices tab, you will find the complete list of invoices for all your projects. Feel free to check the dedicated documentation.
Environment-level settings
In the project's environments' settings, you first need to select the environment whose settings you would like to configure, using the dropdown. Depending on the chosen environment, there are 3 to 4 tabs available:
- General (environment),
 Backups, which are only available for the production environment,
 Domains,
- and
 Variables.
General (environment)
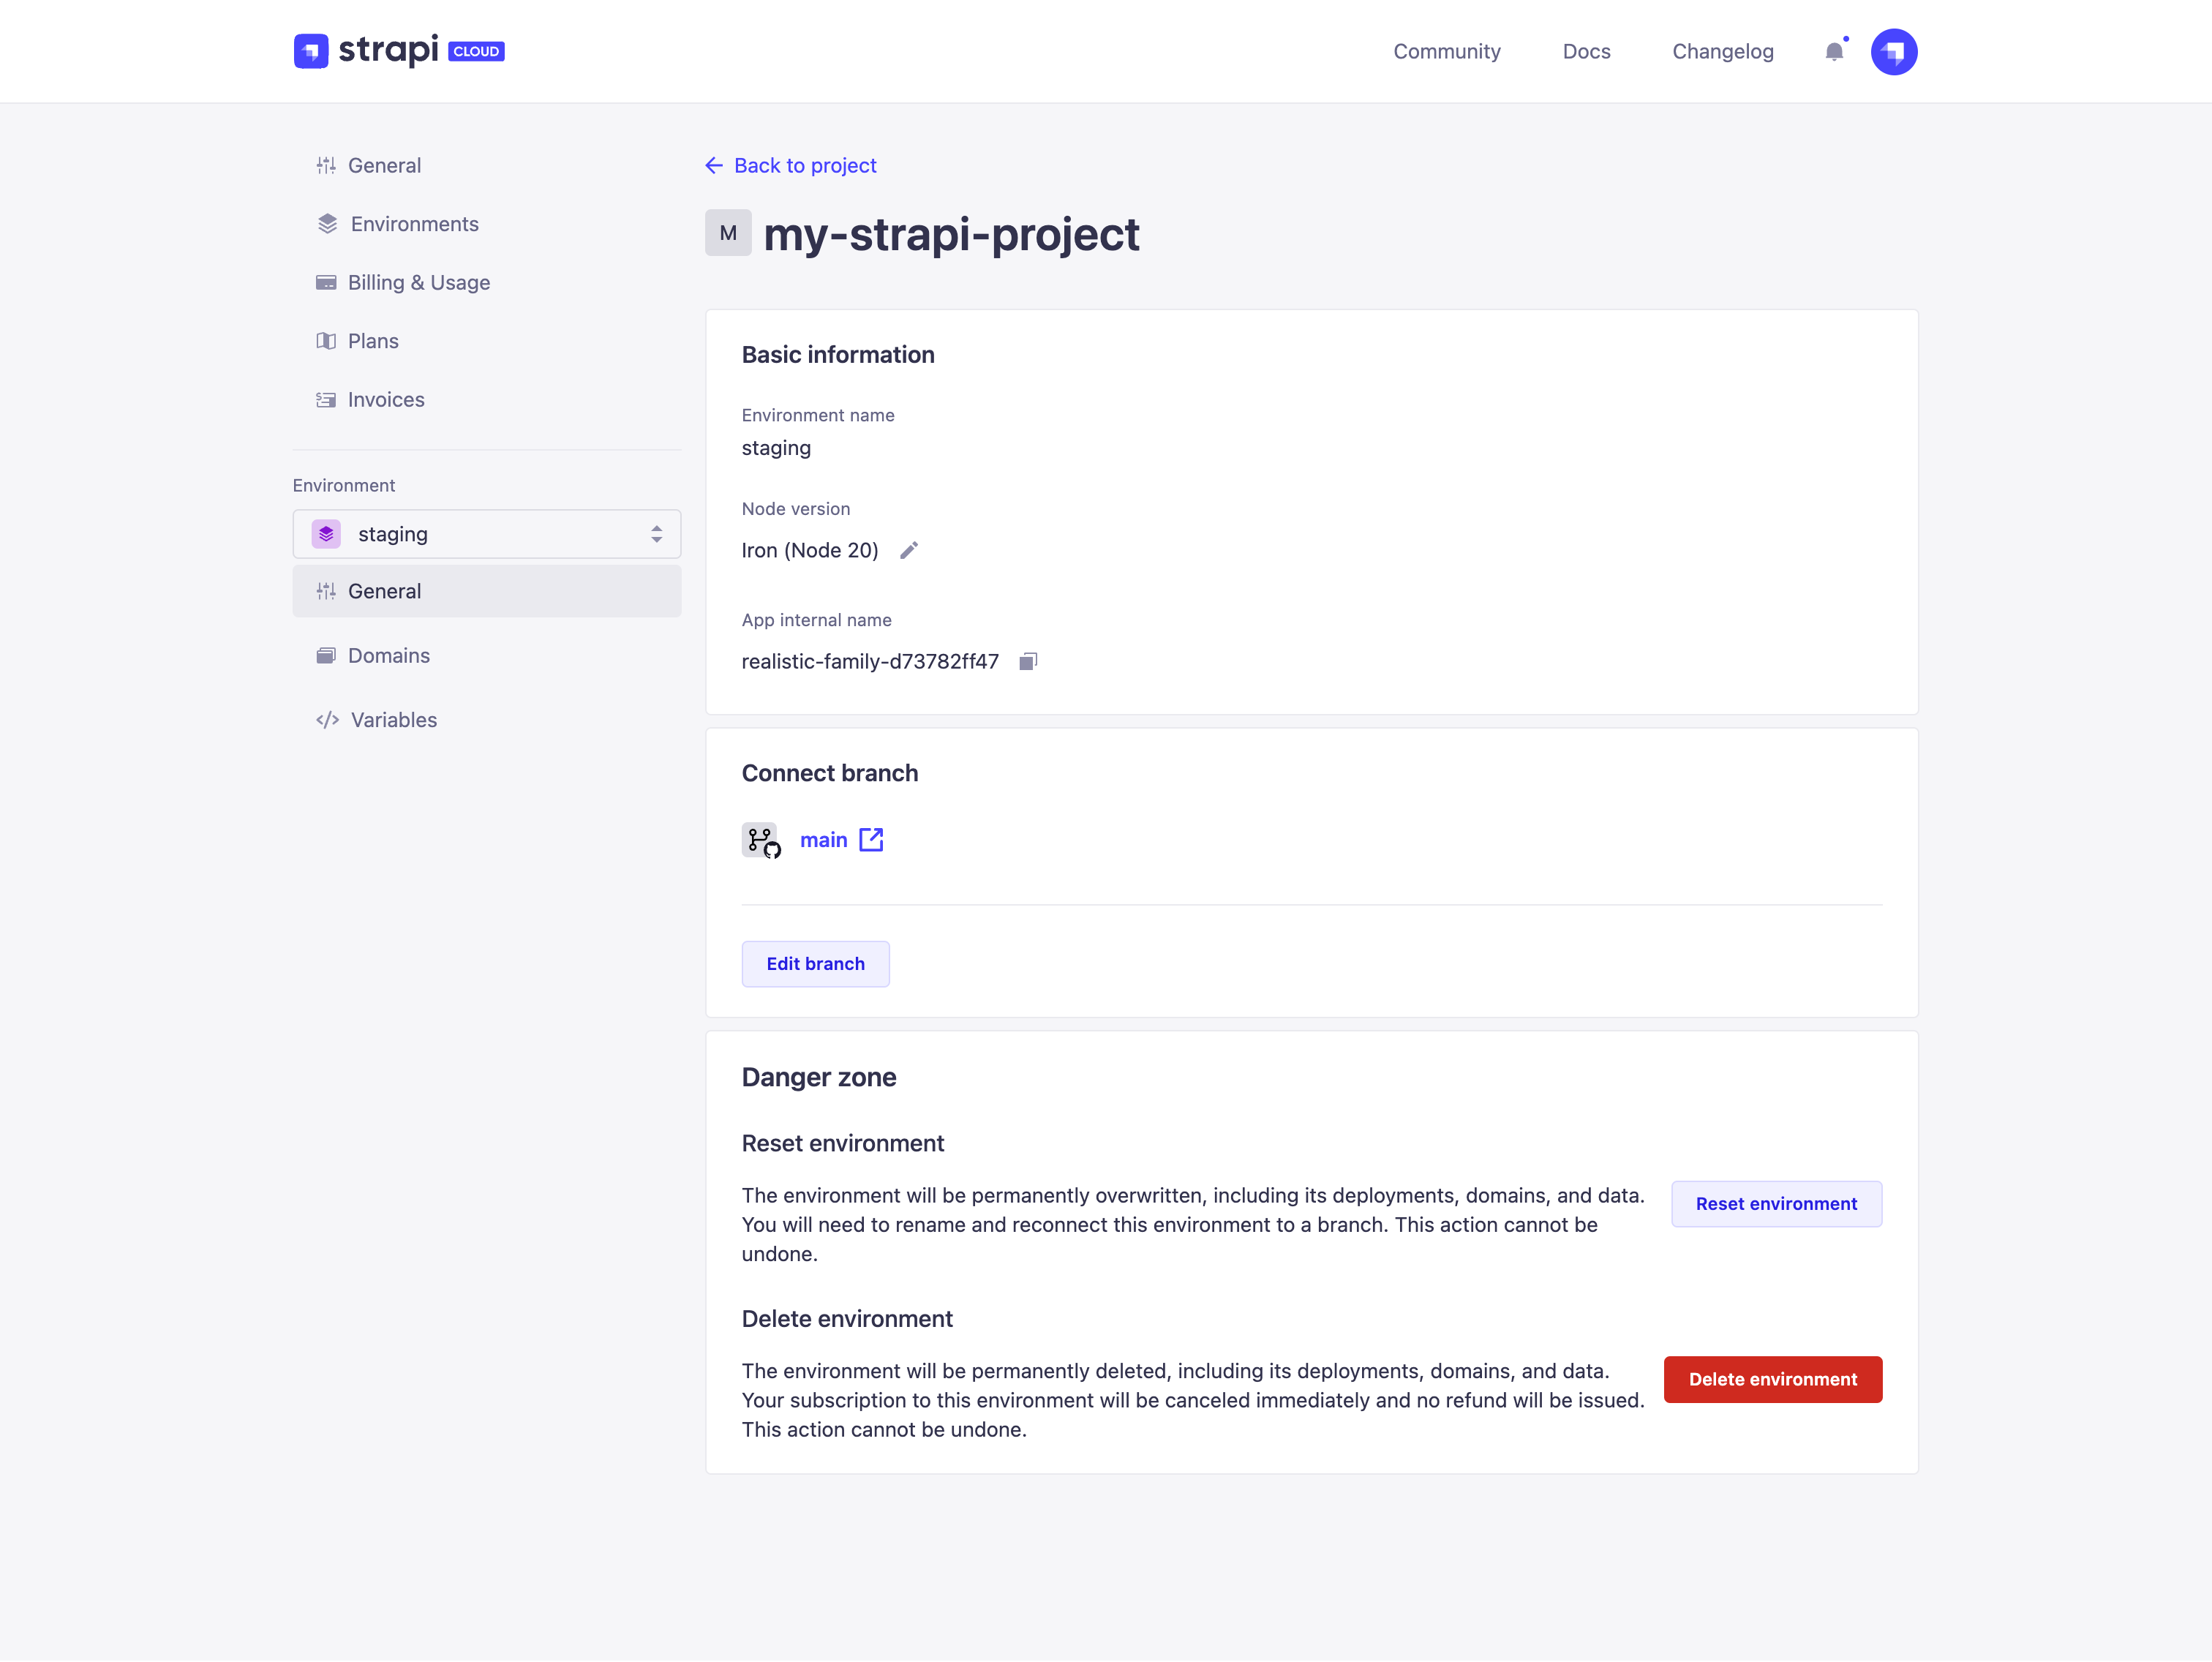
The ![]() General tab for the environment-level settings enables you to check and update the following options for the project:
General tab for the environment-level settings enables you to check and update the following options for the project:
- Basic information, to see:
- the name of your Strapi Cloud project's environment. The environment name is set when it is created and cannot be modified afterwards.
- the Node version of the environment: to change the Node version of the project (see Modifying Node version).
- the app's internal name for the environment, which can be useful for debug & support purposes.
- Connect branch: to change the branch of the GitHub repository used for your environment (see Editing Git branch). Also allows to enable/disable the "deploy on push" option.
- Danger zone: to reset or permanently delete your Strapi Cloud project's environment (see Resetting & Deleting environment).

Modifying Node version
The environment's Node version is based on the one chosen at the creation of the project (see Creating a project), through the advanced settings. It is possible to switch to another Node version afterwards, for any environment.
- In the Basic information section of the General tab, click on the Node version's edit
 button.
 - Using the Node version drop-down in the dialog, click on the version of your choice.
- Click on the Save button.
- Trigger a new deployment in the environment for which you changed the Node version. If the deployment fails, it is because the Node version doesn't match the version of your Strapi project. You will have to switch to the other Node version and re-deploy your project again.
Editing Git branch
In the Connected git repository section of the
General tab, click on the Edit branch button.In the Edit branch dialog, edit the available settings. Note that the branch can be edited for all environments at the same time via the project's settings, see General (project).
Setting name Instructions Selected branch (mandatory) Choose a branch from the drop-down list. Base directory Write the path of the base directory in the textbox. Deploy the project on every commit pushed to this branch Tick the box to automatically trigger a new deployment whenever a new commit is pushed to the selected branch. Untick it to disable the option. Click on the Save button.
Resetting & Deleting environment
You can reset or delete any additional environment of your Strapi Cloud project, but it will be permanent and irreversible. The default, production environment, can however not be neither reset nor deleted.
Resetting an environment
Resetting an environment deletes all environments data and resets the variables to their default. To do so:
In the Danger zone section of the
General tab, click on the Reset environment button.In the dialog that opens, click on the Continue button to confirm the environment reset.
Fill in the available fields to reset the environment:
Setting name Instructions Environment name (mandatory) Write a name for your project's new environment. Git branch (mandatory) Choose a branch from the drop-down list. Base directory Write the path of the base directory in the textbox. Deploy the project on every commit pushed to this branch Tick the box to automatically trigger a new deployment whenever a new commit is pushed to the selected branch. Untick it to disable the option. Click on the Reset button.
Deleting an environment
- In the Danger zone section of the General tab, click on the Delete environment button.
- Write in the textbox your Environment name.
- Click on the Delete environment button to confirm the deletion.
Backups Strapi Cloud Pro Strapi Cloud Team Updated ️🖌
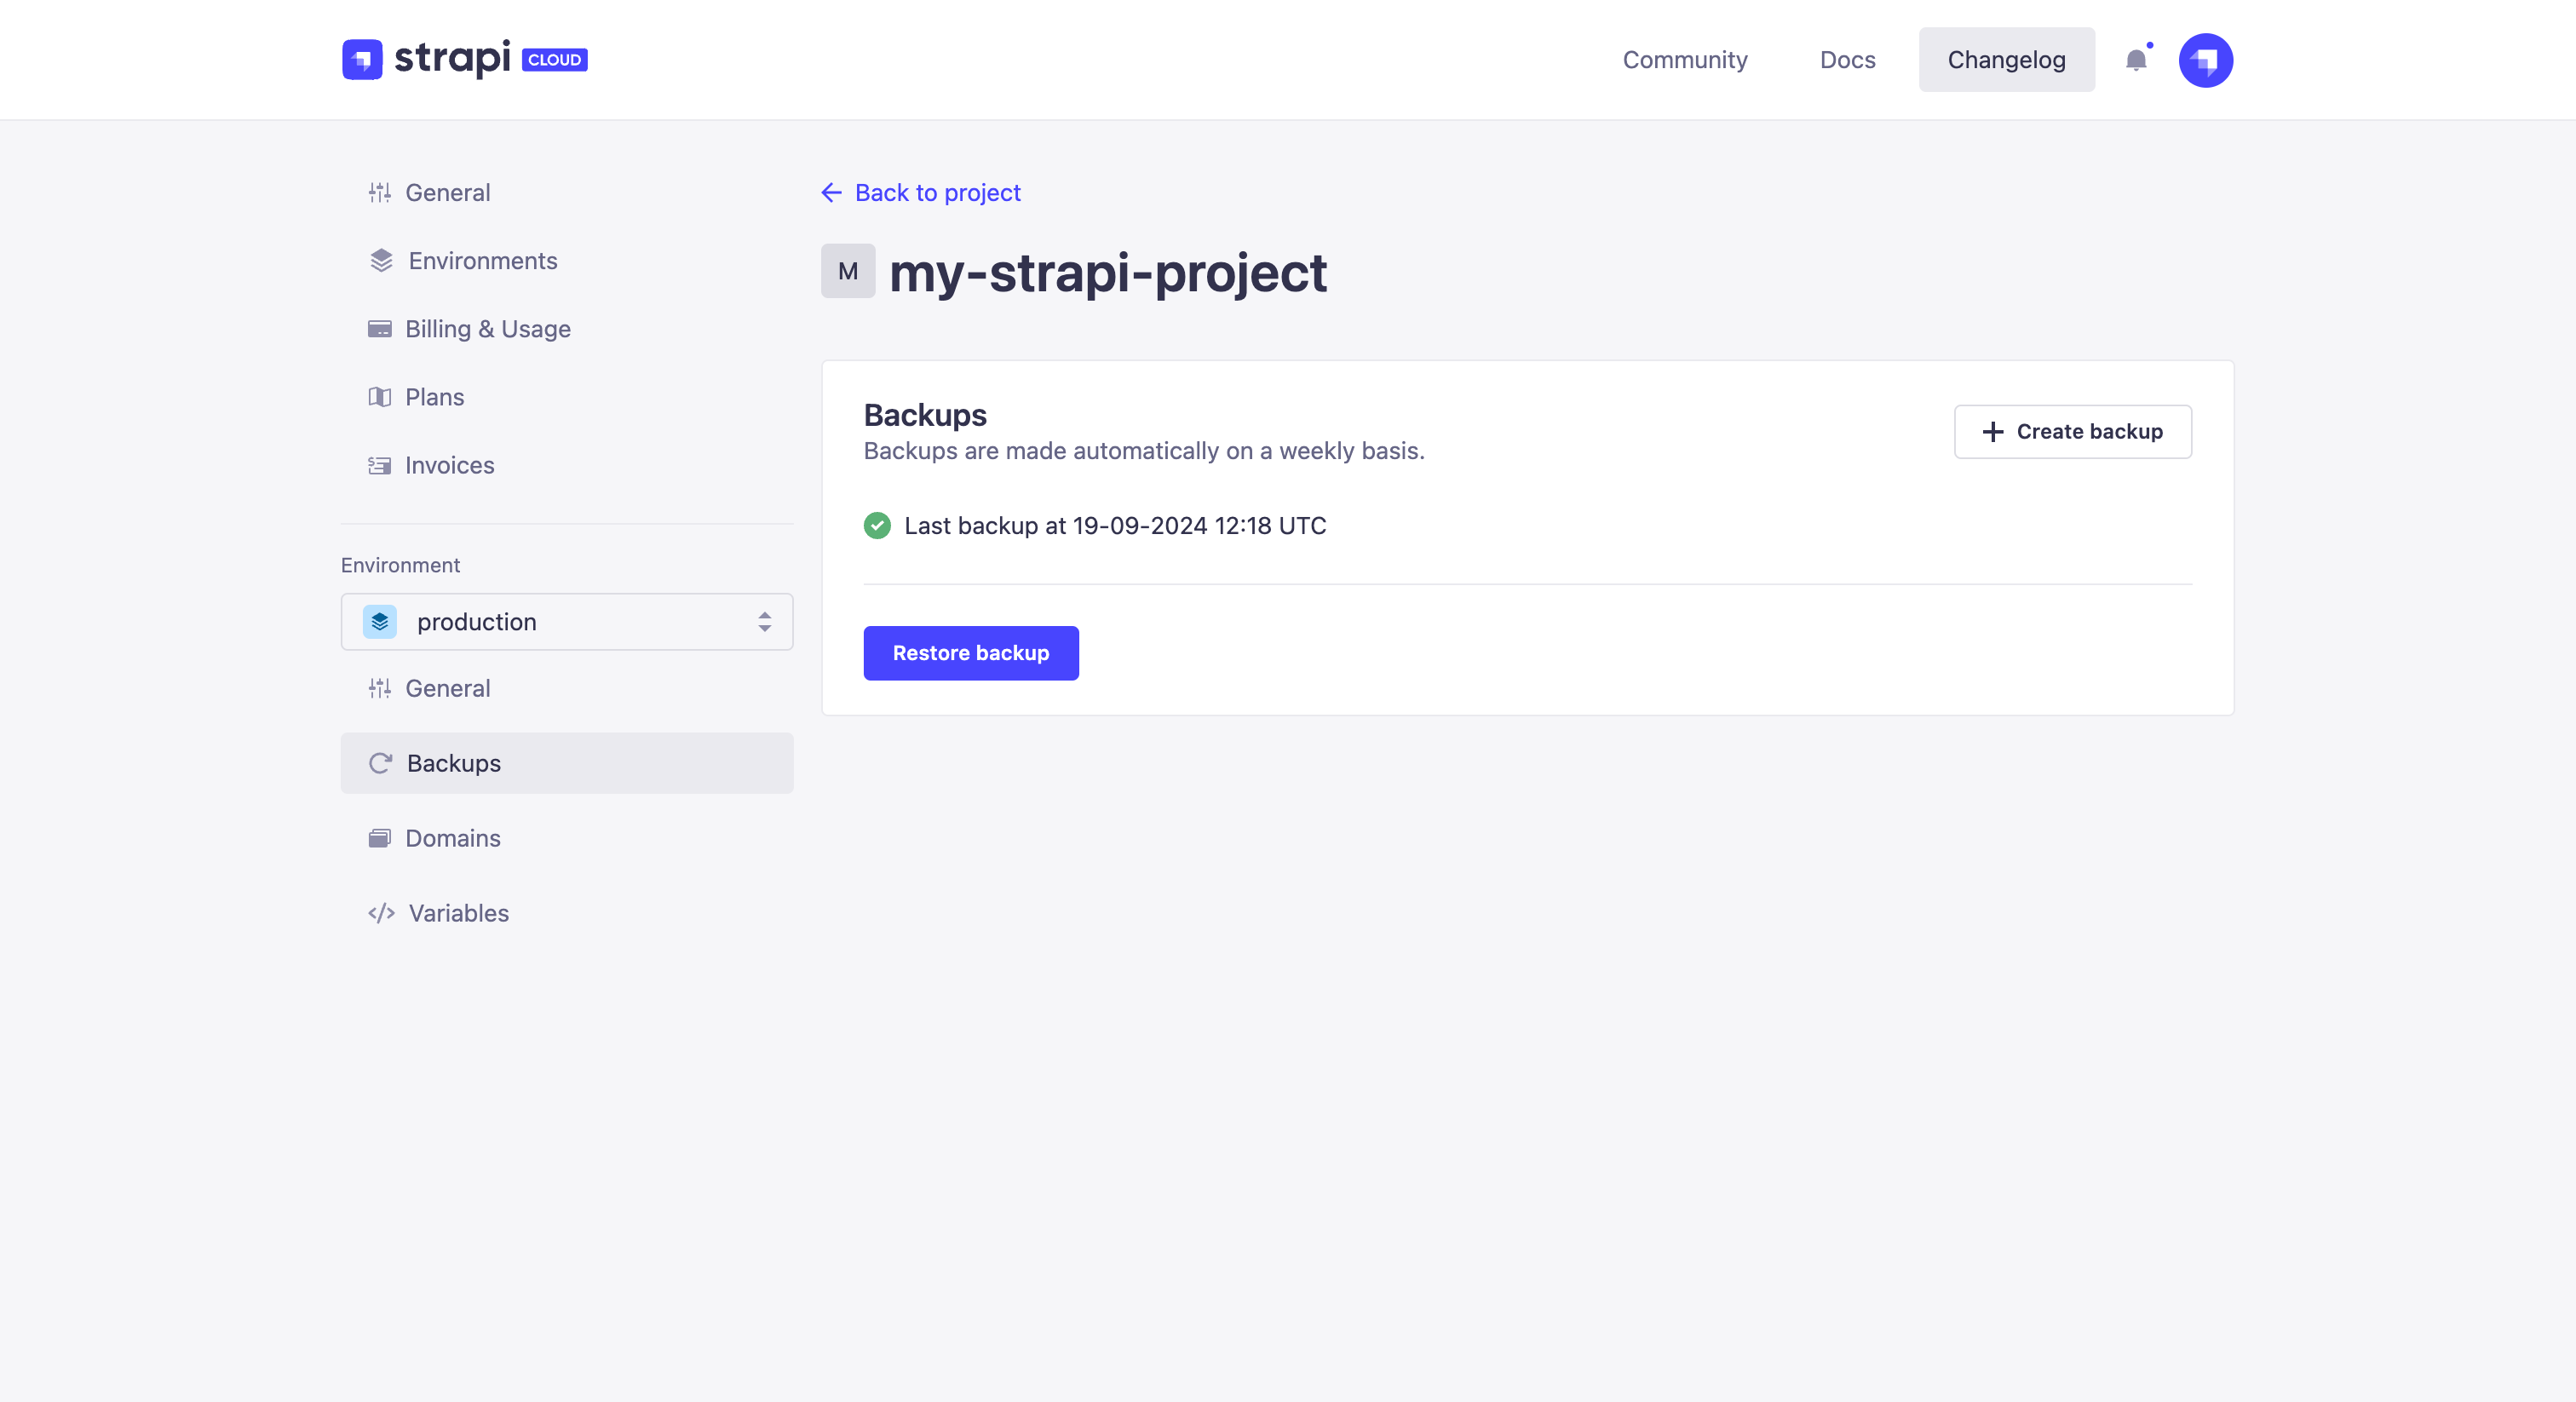
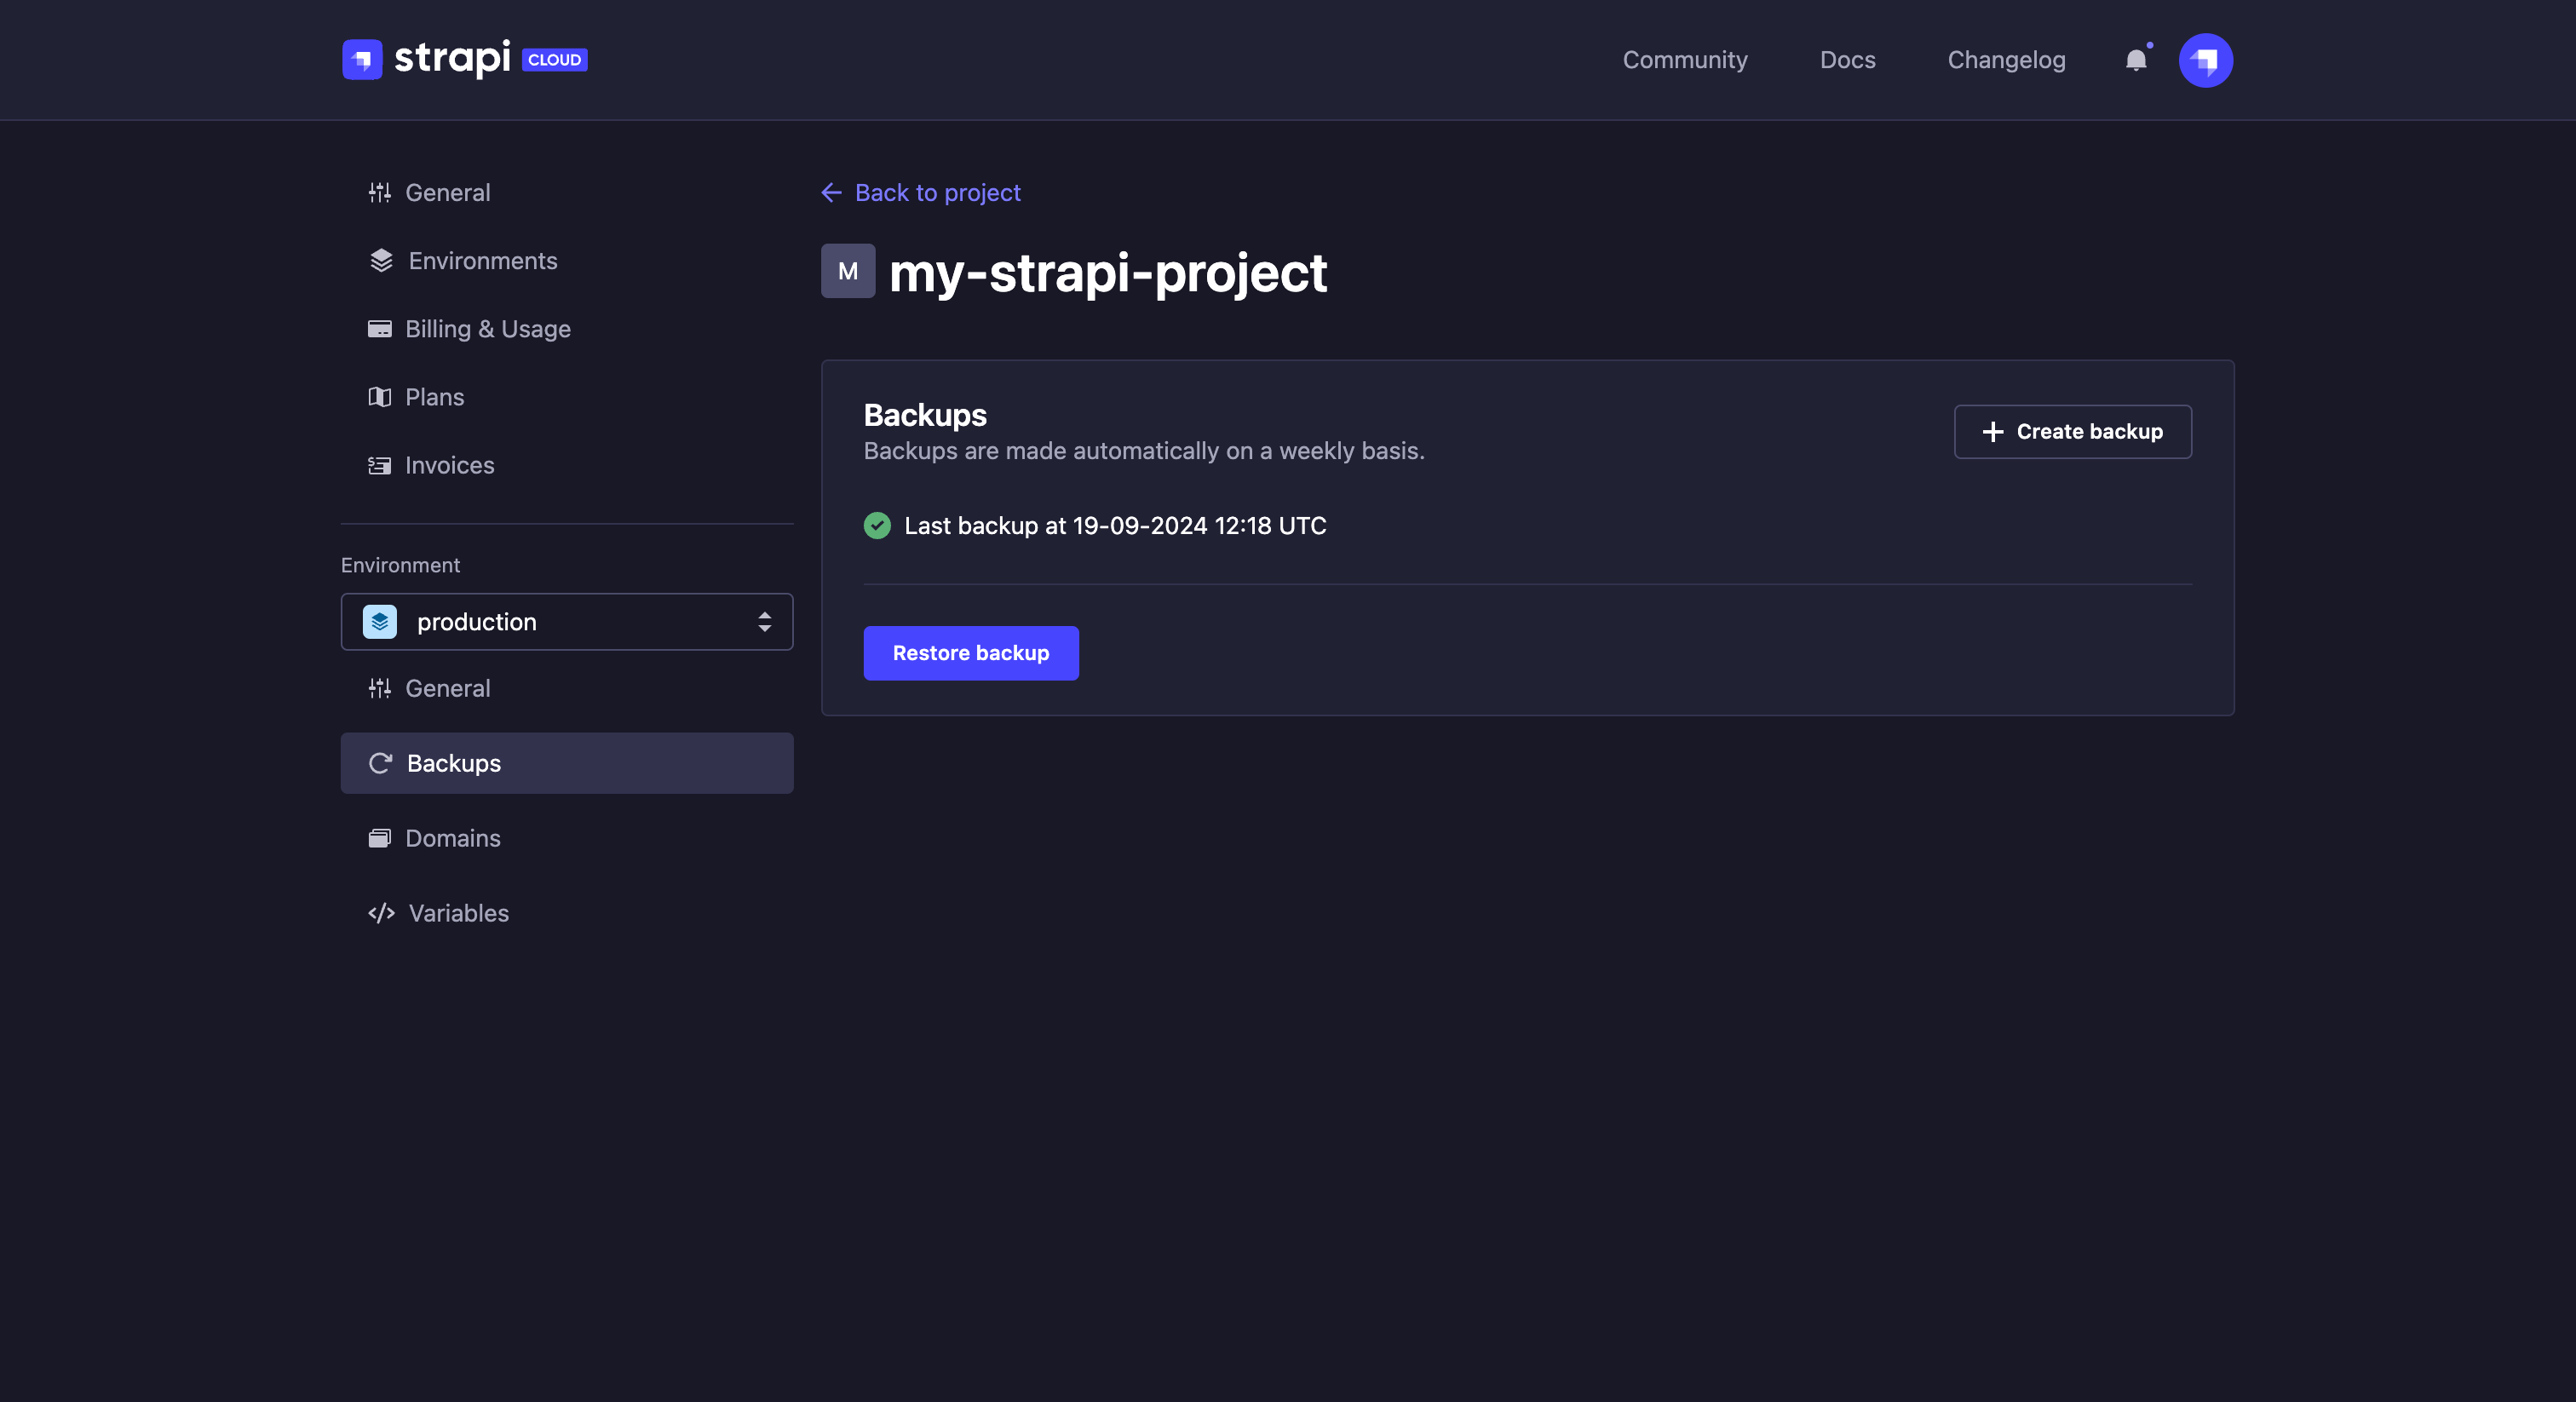
The ![]() Backups tab informs you of the status and date of the latest backup of your Strapi Cloud projects. The databases associated with all existing Strapi Cloud projects are indeed automatically backed up (weekly for Pro plans and daily for Team plans). Backups are retained for a 28-day period. Additionally, you can create a single manual backup.
Backups tab informs you of the status and date of the latest backup of your Strapi Cloud projects. The databases associated with all existing Strapi Cloud projects are indeed automatically backed up (weekly for Pro plans and daily for Team plans). Backups are retained for a 28-day period. Additionally, you can create a single manual backup.
- The backup feature is not available for Strapi Cloud projects using the free trial or the Developer plan. You will need to upgrade to either the Pro or Team plan to have your project automatically backed up and to have access to manual backups.
The manual backup option should become available shortly after project's first succesful deployment.
The backup feature is only available for the default, production environment. Other additional environment's settings will not show the
Backups tab.
For projects created before the release of the Backup feature in October 2023, the first backup will automatically be triggered with the next deployment of the project.
Creating a manual backup
To create a manual backup, in the ![]() Backups section, click on the Create backup button.
Backups section, click on the Create backup button.
The manual backup should start immediately, and restoration or creation of other backups will be disabled until backup is complete.
When creating a new manual backup, any existing manual backup will be deleted. You can only have one manual backup at a time.
Restoring a backup
If you need to restore a backup of your project:
- In the Backups section, click on the Restore backup button.
- In the dialog, choose one of the available backups (automatic or manual) of your project in the Choose backup drop-down.
- Click on the Restore button of the dialog. Once the restoration finished, your project will be back to the state it was at the time of the chosen backup.
Domains
The ![]() Domains tab enables you to manage domains and connect new ones.
Domains tab enables you to manage domains and connect new ones.
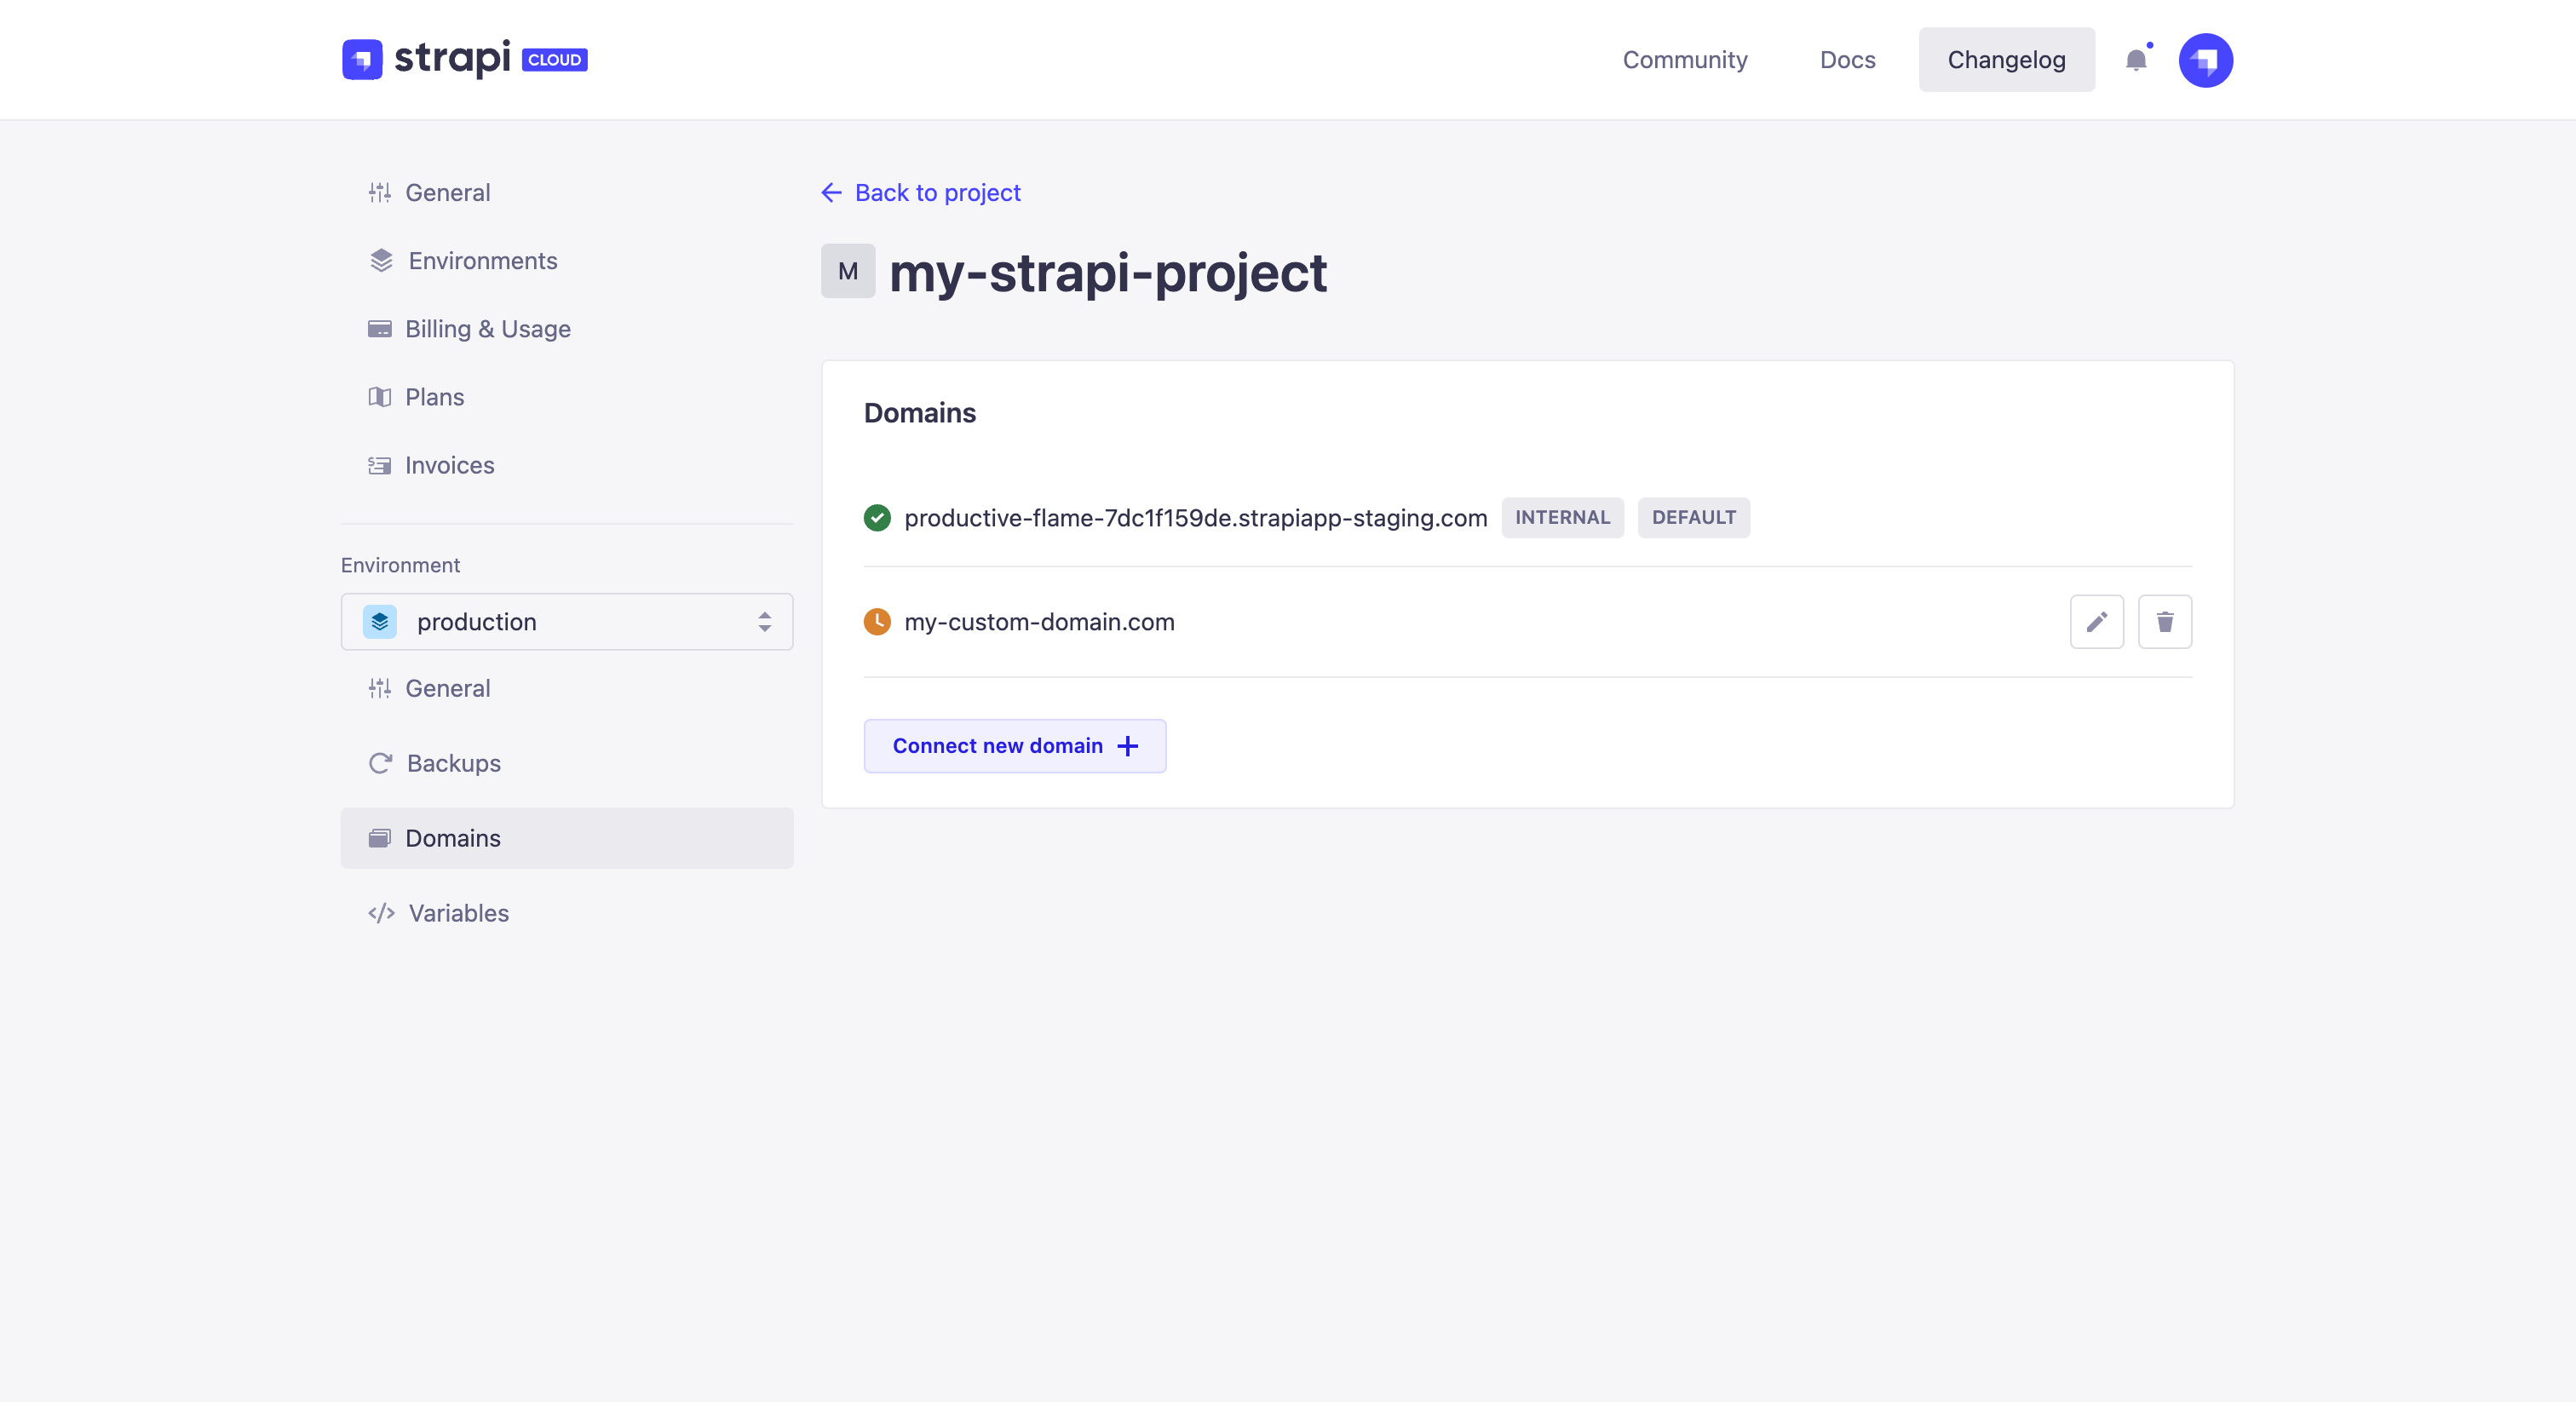
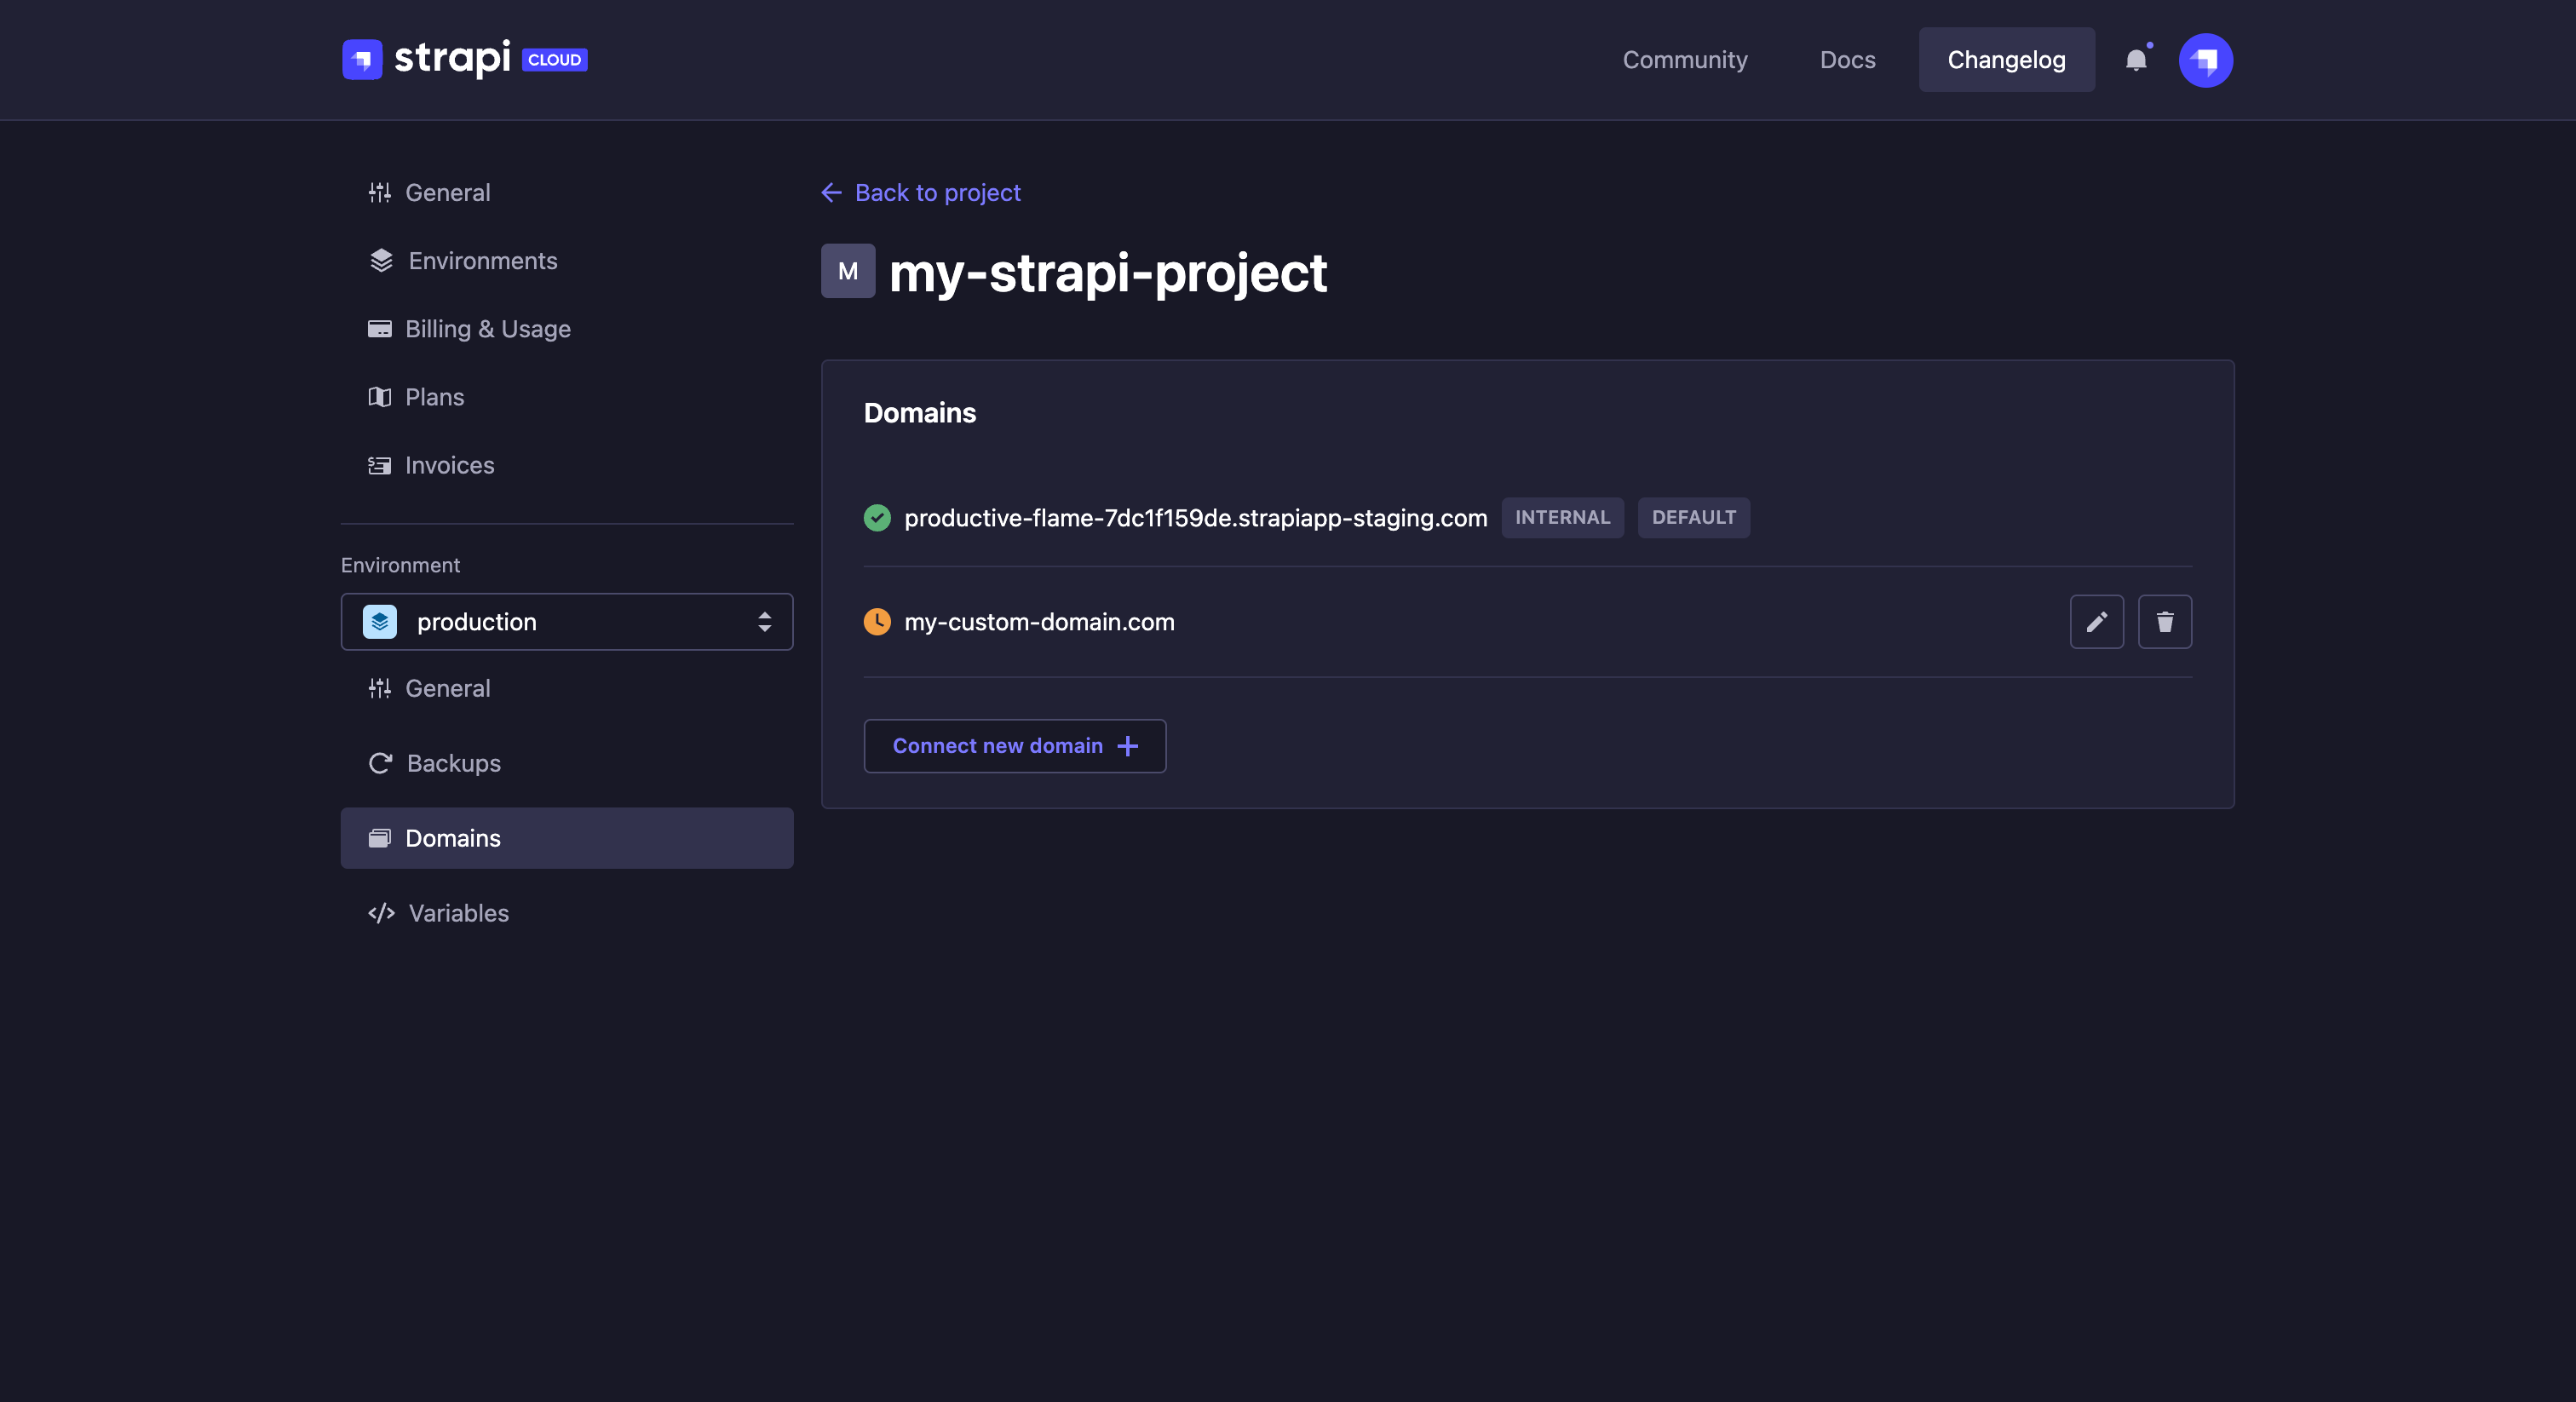
All existing domains for your Strapi Cloud project are listed in the ![]() Domains tab. For each domain, you can:
Domains tab. For each domain, you can:
- see its current status:
 Active: the domain is currently confirmed and active
 Pending: the domain transfer is being processed, waiting for DNS changes to propagate
 Failed: the domain change request did not complete as an error occured
- click the edit button to access the settings of the domain
- click the
 delete button to delete the domain
Connecting a custom domain
Default domain names are made of 2 randomly generated words followed by a hash. They can be replaced by any custom domain of your choice.
- Click the Connect new domain button.
- In the window that opens, fill in the following fields:
| Setting name | Instructions |
|---|---|
| Domain name | Type the new domain name (e.g. custom-domain-name.com) |
| Hostname | Type the hostname (i.e. address end-users enter in web browser, or call through APIs). |
| Target | Type the target (i.e. actual address where users are redirected when entering hostname). |
| Set as default domain | Tick the box to make the new domain the default one. |
- Click on the Save button.
Variables
Environment variables (more information in the Developer Documentation) are used to configure the environment of your Strapi application, such as the database connection.
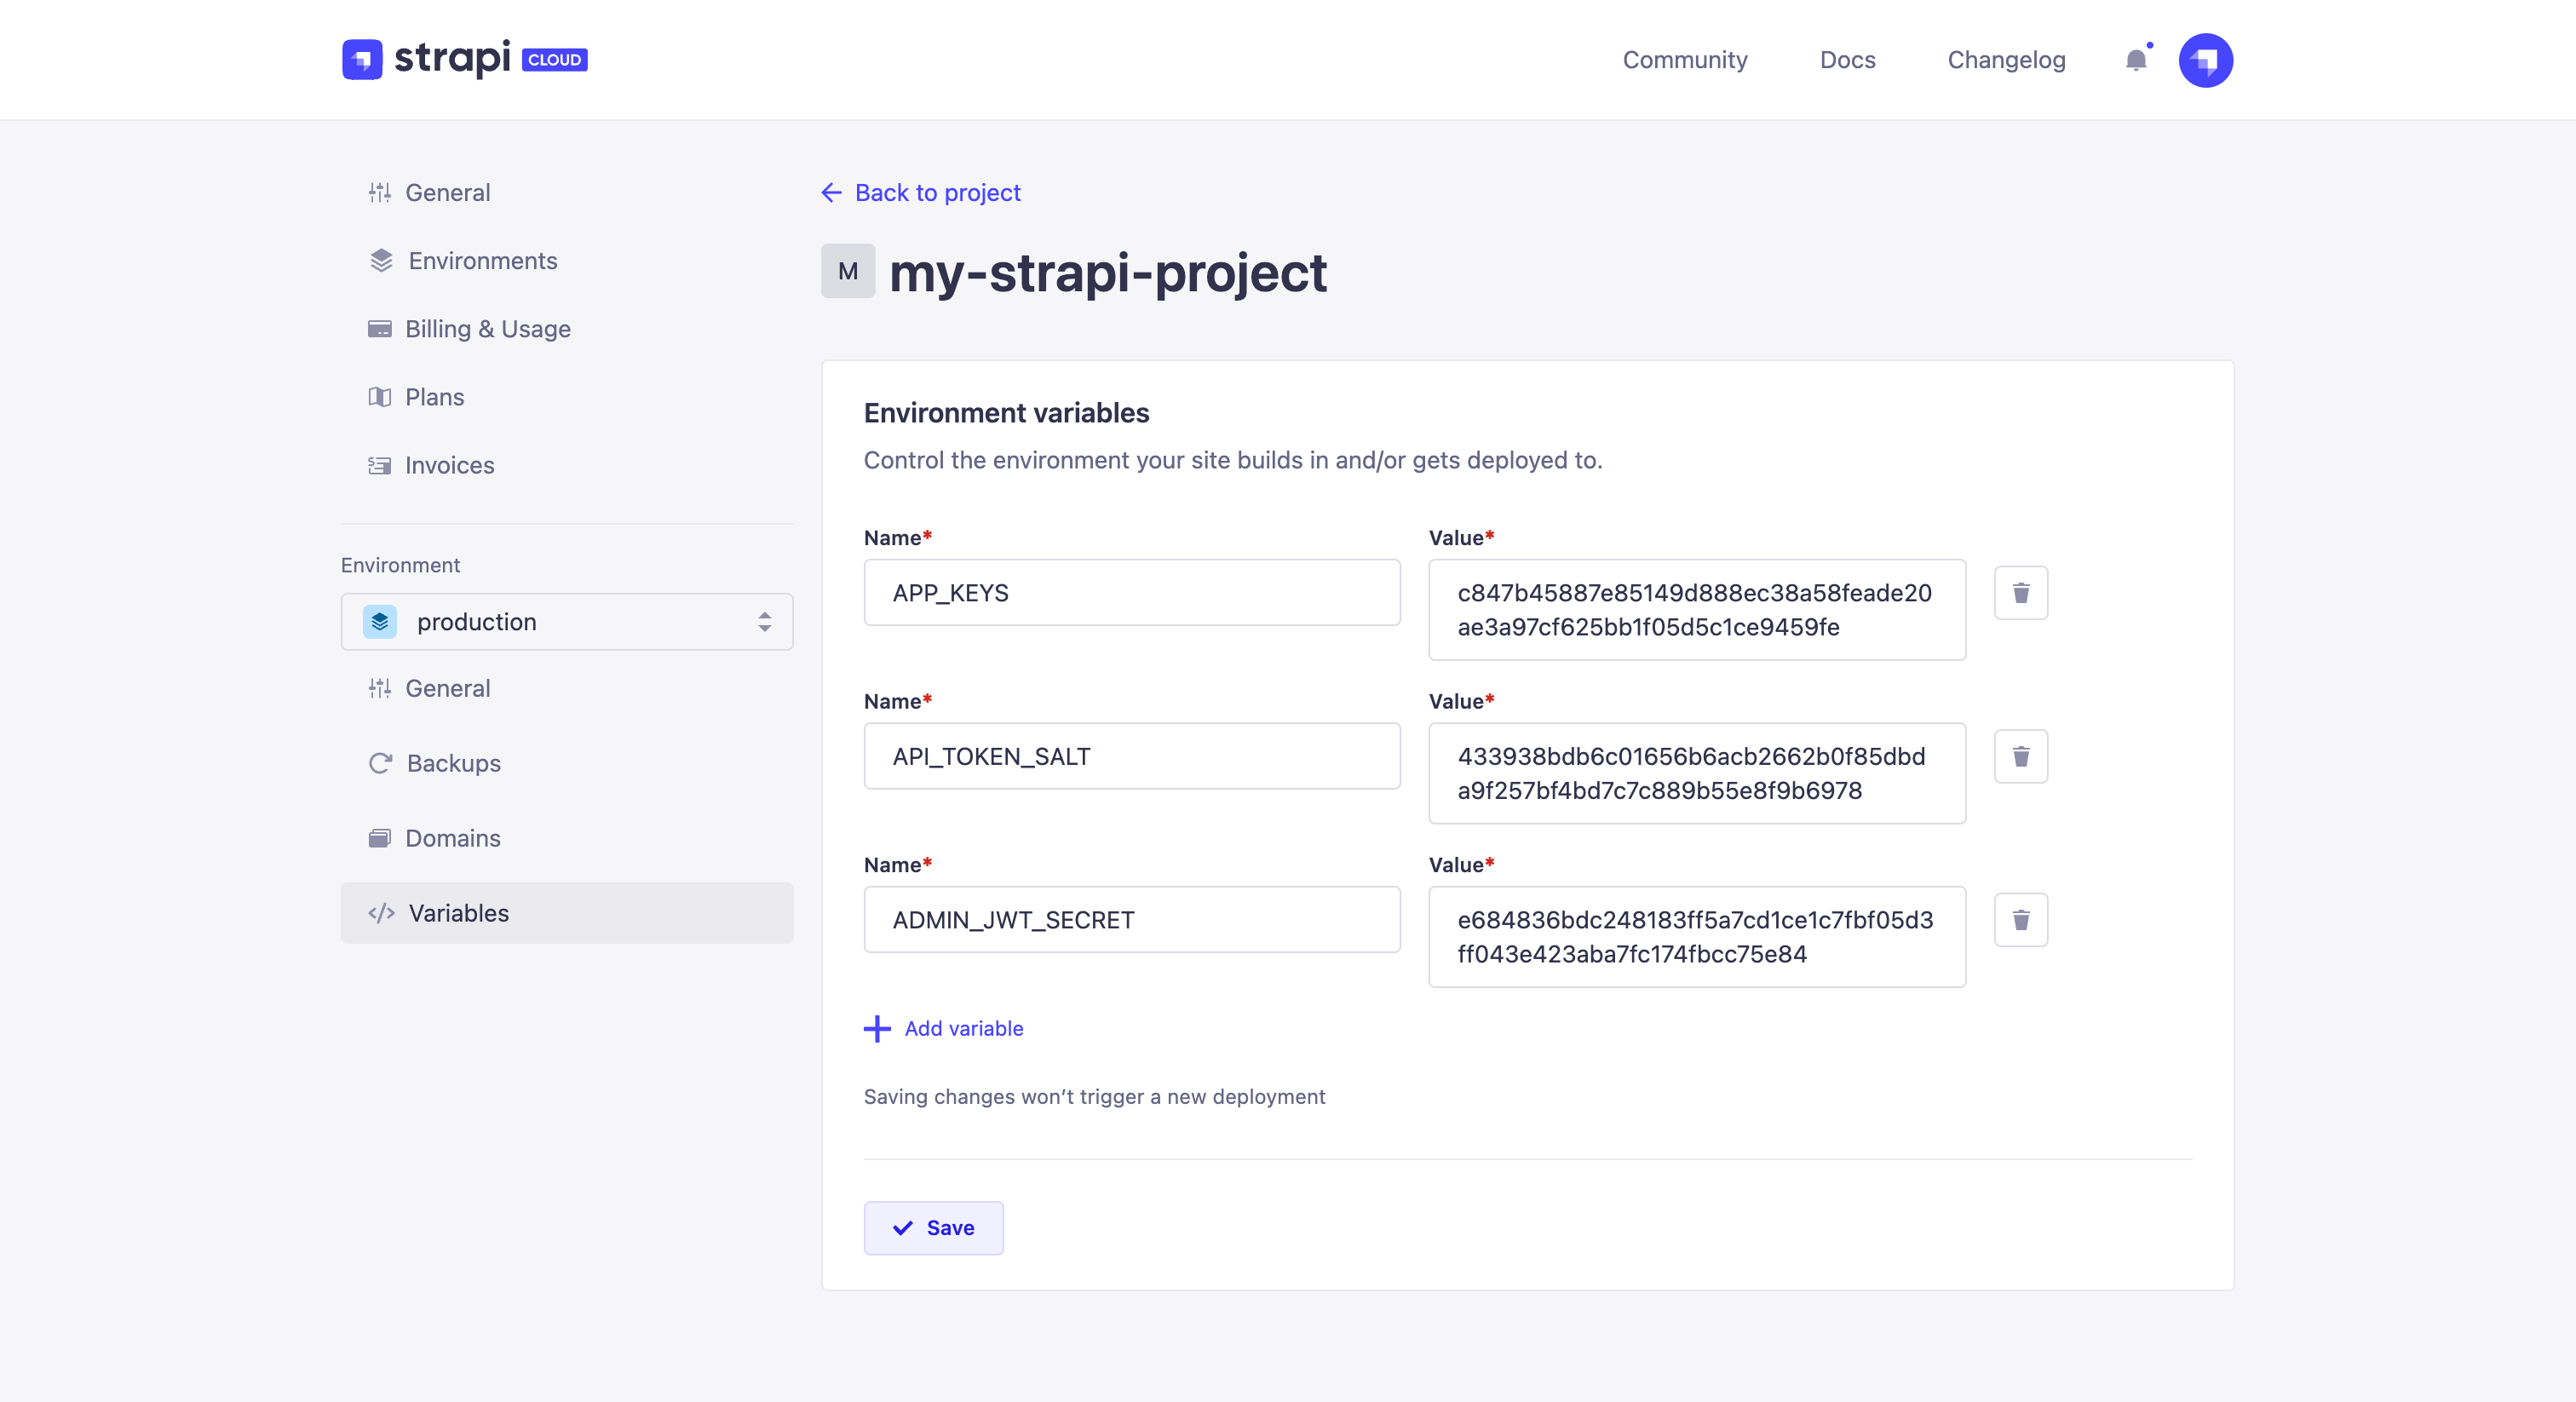
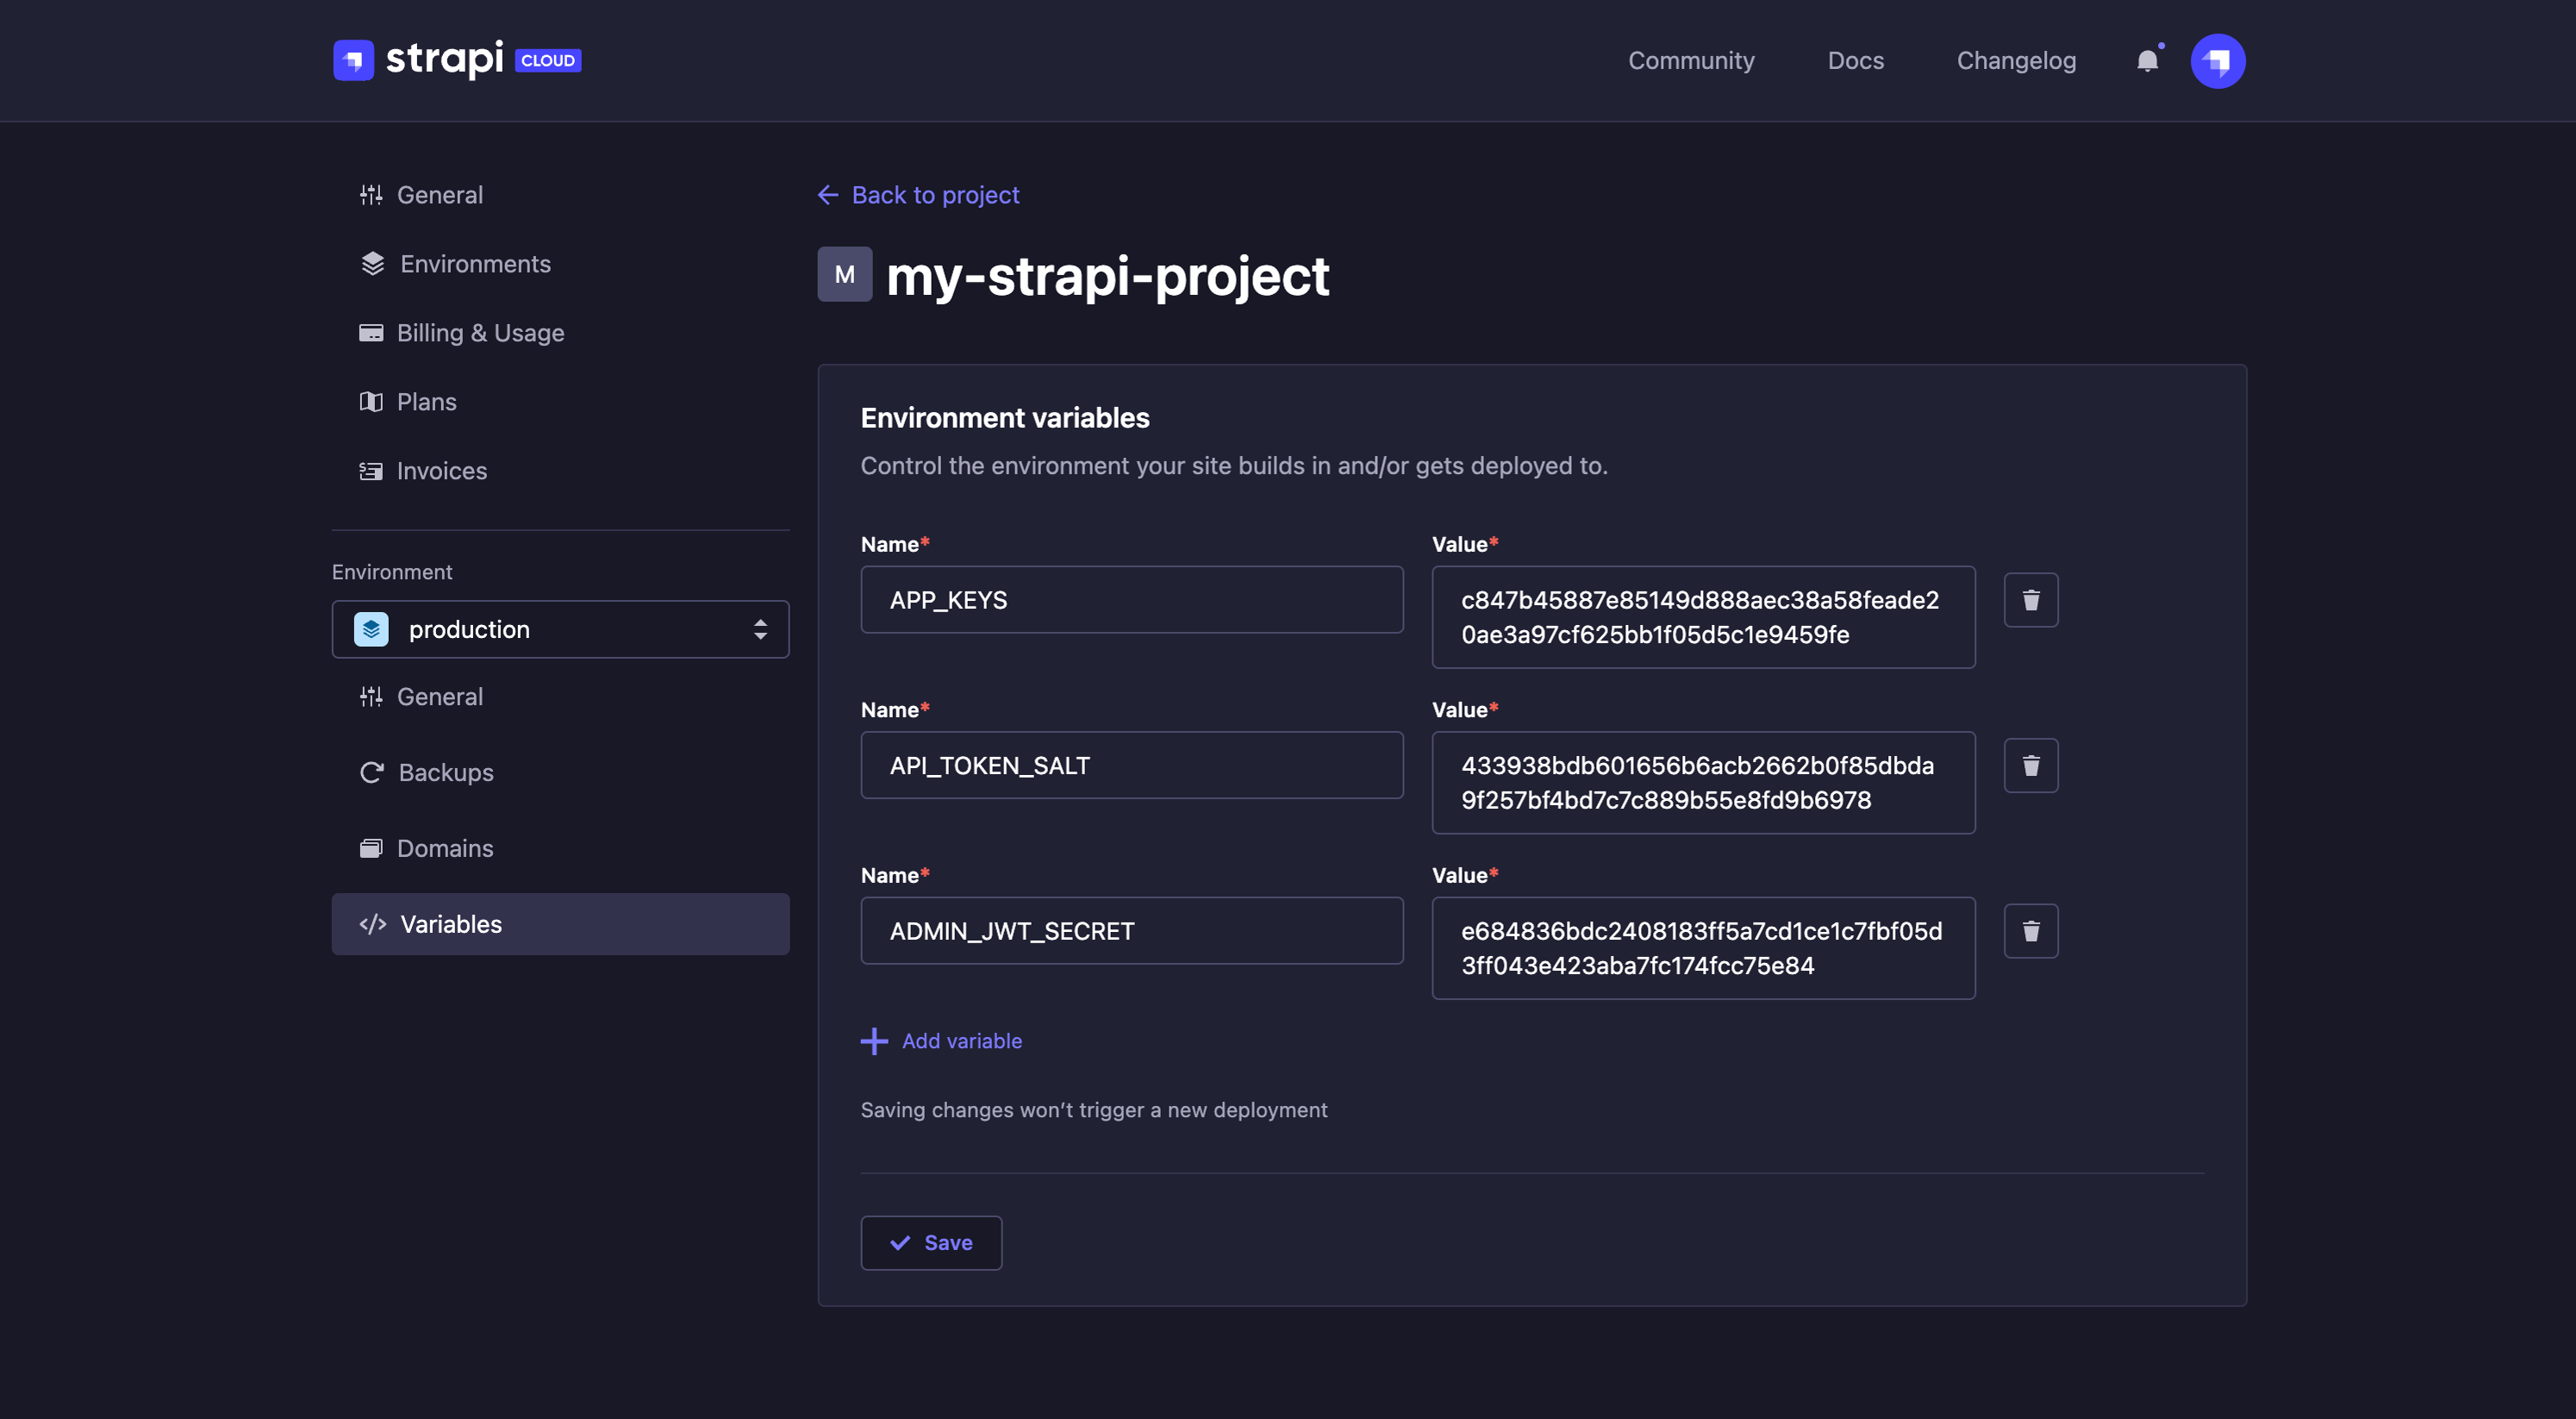
In the ![]() Variables tab, you can:
Variables tab, you can:
- click the Add variable button to create a new variable
- edit any variable, each being composed of a Name and a Value
- click the delete button associated with any non-default variable to delete it
- click the Save button to save any change made on the page